App Plateform use case
For the past 5 years I have been a fan of Digital Ocean, it is decently priced and offers everything I need to host my professional and personal projects.
While I have been using their droplets for a long time, I partially switch to their App Plateform 2 years ago and I have been loving it so far.
It is a great way to deploy your projects without having to worry about the infrastructure, scaling and downtime.
In this post, I will show you how to deploy a Django app on Digital Ocean App Plateform, the pros and cons of using it and how to set up a custom domain.
Prerequisites
Before we start, you need to have a Digital Ocean account. If you don’t have one, you can create one here. You also need to have a Django project that you want to deploy, If you want to follow along, you can generate a new Django project by using Cookiecutter Django.
You can find the instructions here (I love Cookiecutter Django, and will be writing a post about it soon).
Although it is not required, I recommend you to have a custom domain. I used to love Google Domains, but since it has been acquired by Squarespace I have switched to Cloudflare.
Finally, you need to have a database, I recommend using Digital Ocean managed databases, they are easy to set up with Digital Ocean App Plateform but cost a bit more than self-hosted databases.
Scroll down to the “Creating a managed database” section to see how to set up a managed database.
Note: You cannot deploy a Django app without a remote database, since Digital Ocean App Plateform runs your app in a container, your database will be destroyed when the container is destroyed at each deployment.
Setting up the Django project
Before we deploy our Django app, we need to make sure that everything is set up correctly, a first good step is to use the Django check command to see if there are any issues with our project.
python3 manage.py check --deploy --settings config.settings.production
Where config.settings.production is the settings file for the production environment. If you are using Cookiecutter Django, it should be config.settings.production.
You should not have any issues, if you do, you need to fix them before deploying your app.
Make sure to have a requirements.txt or a Pipfile that contains all the dependencies of your project for the production environment.
If you are using a Cookiecutter Django project, you can generate a requirements.txt file by running the following command:
pip freeze -r requirements/production.txt >> requirements.txt
or if you are using a Pipfile:
pipenv install -r requirements/production.txt
Understanding the Digital Ocean App Plateform
Digital Ocean App Plateform is a Platform as a Service (PaaS) that allows you to deploy your apps without having to worry about the infrastructure. It is similar to Heroku, but I find it easier to use and more affordable.
When you launch an app on Digital Ocean App Plateform, it creates a container that runs your app, you can scale the app horizontally or vertically with a few clicks, you can also set up a custom domain, a managed database, a CDN for the static files and more.
Pros and Cons of using Digital Ocean App Plateform
While I love Digital Ocean App Plateform, it is not perfect, when it first came out, the build times were slow and sometimes the app would not build for obscure reasons.
However, Digital Ocean has been improving the platform and I have not had any issues in the past year.
Here are the pros and cons of using Digital Ocean App Plateform:
Pros
- Easy to use, you can deploy your app in minutes without any prior knowledge of DevOps, Linux or Docker.
- Affordable, the pricing is transparent and you only pay for what you use, meaning that you can set a fixed budget and not worry about unexpected costs.
- Scalable, you can scale your app horizontally or vertically with a few clicks.
- Secure, Digital Ocean takes care of the security of the platform, you do not have to worry about security updates, patches or vulnerabilities, you connect through their UI and that’s it.
- Zero downtime deployments, you can deploy your app without any downtime, Digital Ocean is using a rolling deployment strategy that ensures that your app is always available.
Cons
- Price, while it is affordable, it go up quickly especially when setting up managed databases, storage or other services.
- Missing features, Digital Ocean App Plateform is still missing some features such as scheduled tasks, background workers or cron jobs, you need to use other services for that.
- Still a bit slow, the build times are still irritatingly slow sometimes
Deploying the Django app
Now that we have our Django project set up and we understand the Digital Ocean App Plateform, we can deploy our app, first go to the Digital Ocean App Plateform dashboard and click on the “Create App” button.
Source code
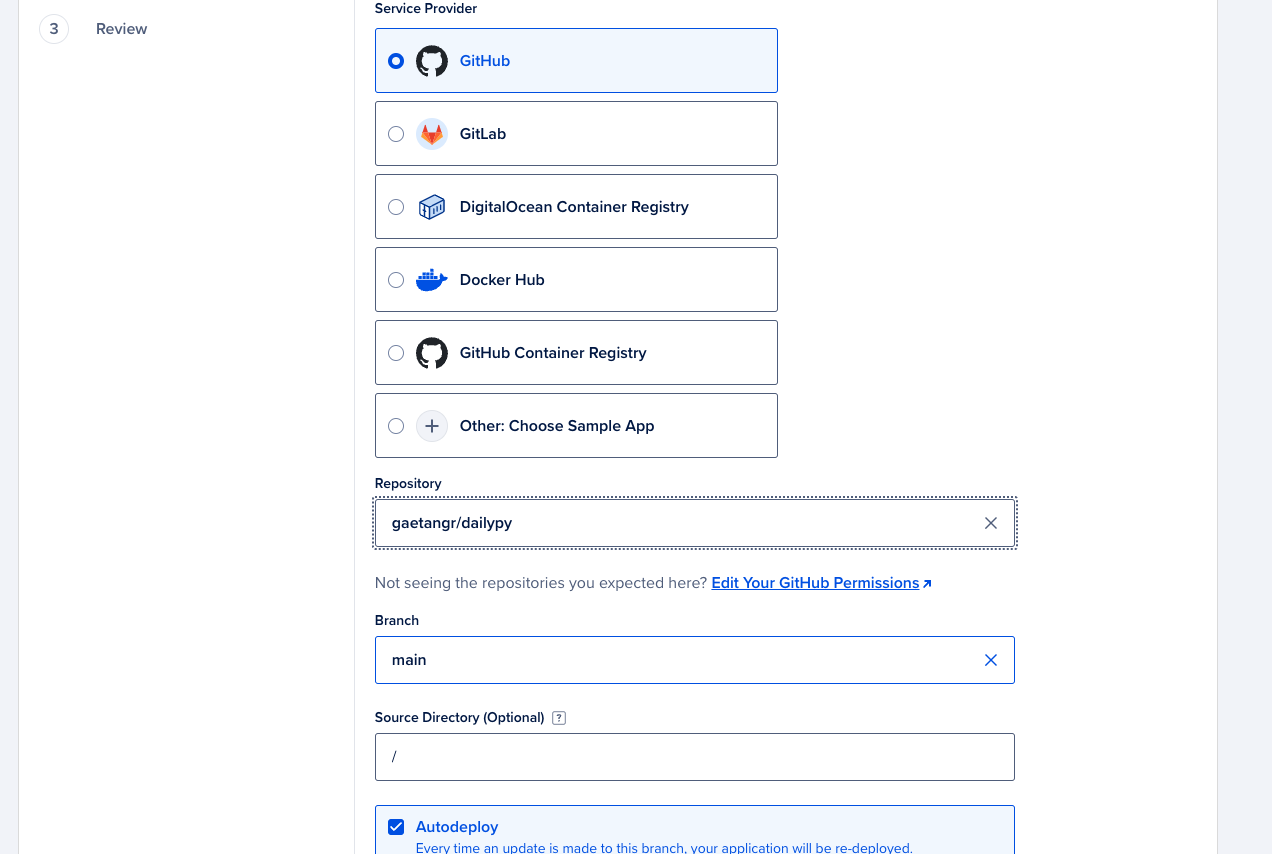
Select the source code repository, in our case it is GitHub, you need to connect your GitHub account and select the repository that contains your Django project, select the branch and the directory where the project is located, depending on your project structure it should be the root directory so leave it as it is, check the “Auto deploy code changes” box if you want to deploy the app automatically when you push to the repository.
Name
This cannot be changed after the app is created. It is used in the URL of the app and in the name of the service.
Make sure the name of the app is meaningful, since you can have multiple apps and multiple services within an app, it is important to have a clear naming convention, for example, I use the name of the project, the service name and the environnement : dailypy_web_production.
Resource Type
It should be set to “Web Service” since we are deploying a Django app, you can also deploy static sites, APIs or background workers, we will only focus on the web service and the static site in this post.
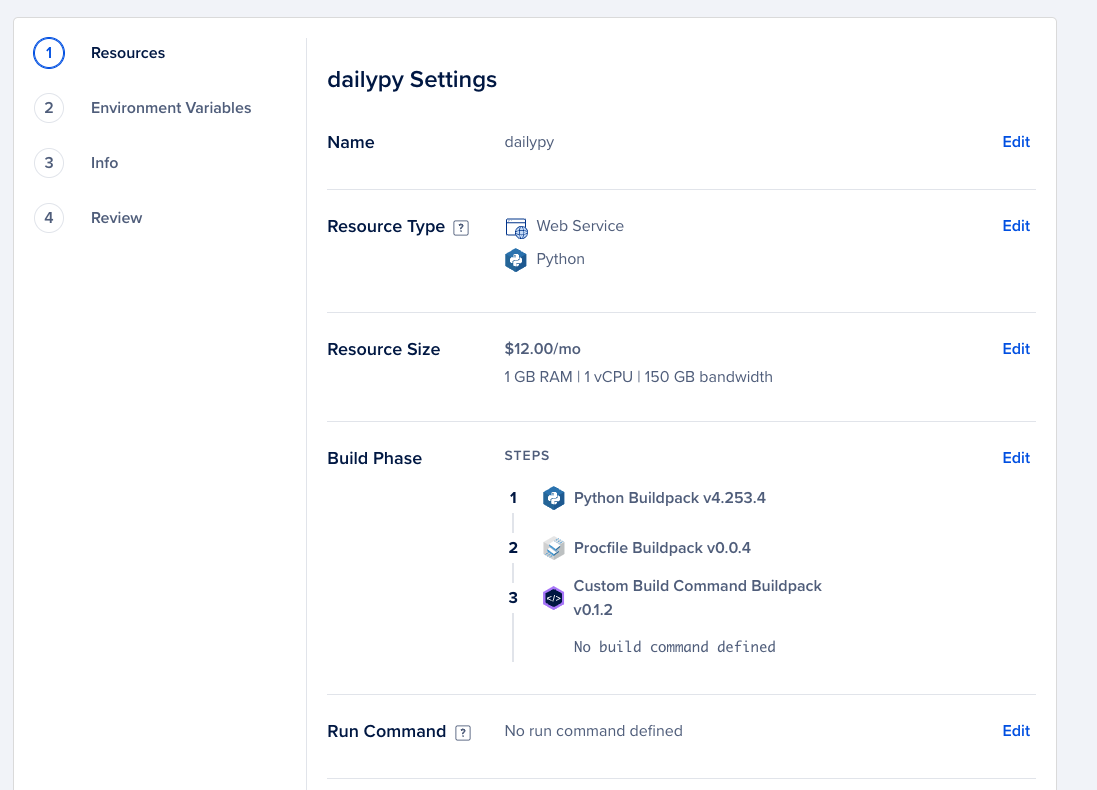
Ressource Size
On the ressources tab, select the plan that fits your needs, I use the 5$ plan for small projects.
This is more than enough for most, once you hit ~80% of the CPU or memory, you can scale up to the next plan.
Remember, once the plan is set, you will not have any surprises, you will only pay for what you use, if you go over the plan, your app might be throttled but you will not be charged more and you can always scale up.
Build Phase
This should not be changed, you can set up later if you need to run some commands before the app is built.
Run Command
This should be changed to the following command:
./manage.py migrate
gunicorn --worker-tmp-dir /dev/shm config.wsgi
Where config.wsgi is the WSGI file of your Django project, if you are using Cookiecutter Django, it should be config.wsgi, otherwise it should be the path to the WSGI file.
The ./manage.py migrate command is used to apply the migrations to the database.
Port
This should not be changed, it is set to 8080 by default.
HTTP Request Routes
This should not be changed, it is set to / by default.
Environment Variables
In the environment tab, you can set up the environment variables, you need to set all the environment variables that are in your .env file, you can use the bulk edit feature to copy and paste the content of the .env file.
Of course, make sure to set the following :
DJANGO_SETTINGS_MODULEtoconfig.settings.productionDATABASE_URLto the URL of your database, if you are using Digital Ocean managed databases, you can find the URL in the database dashboard, see the “Creating a managed database” section to see how to set up a managed database.DJANGO_SECRET_KEYto a random string, you can generate one here.DJANGO_ALLOWED_HOSTSto the domain of your app, or use${APP_DOMAIN}for the domain of the app.DJANGO_ADMIN_URLto the URL of the admin, I recommend changing it to something else than the default/admin/to avoid bots trying to access the admin,import secrets; print(secrets.token_urlsafe(50))can be used to generate a random string.SENTRY_DSNto the DSN of your Sentry project, if you are using Sentry for error tracking.DJANGO_DEBUGtoFalsefor the production environment.
When setting up the environment variables, do not use the global environment variables, but the environment variables of the service, in this case the web service.
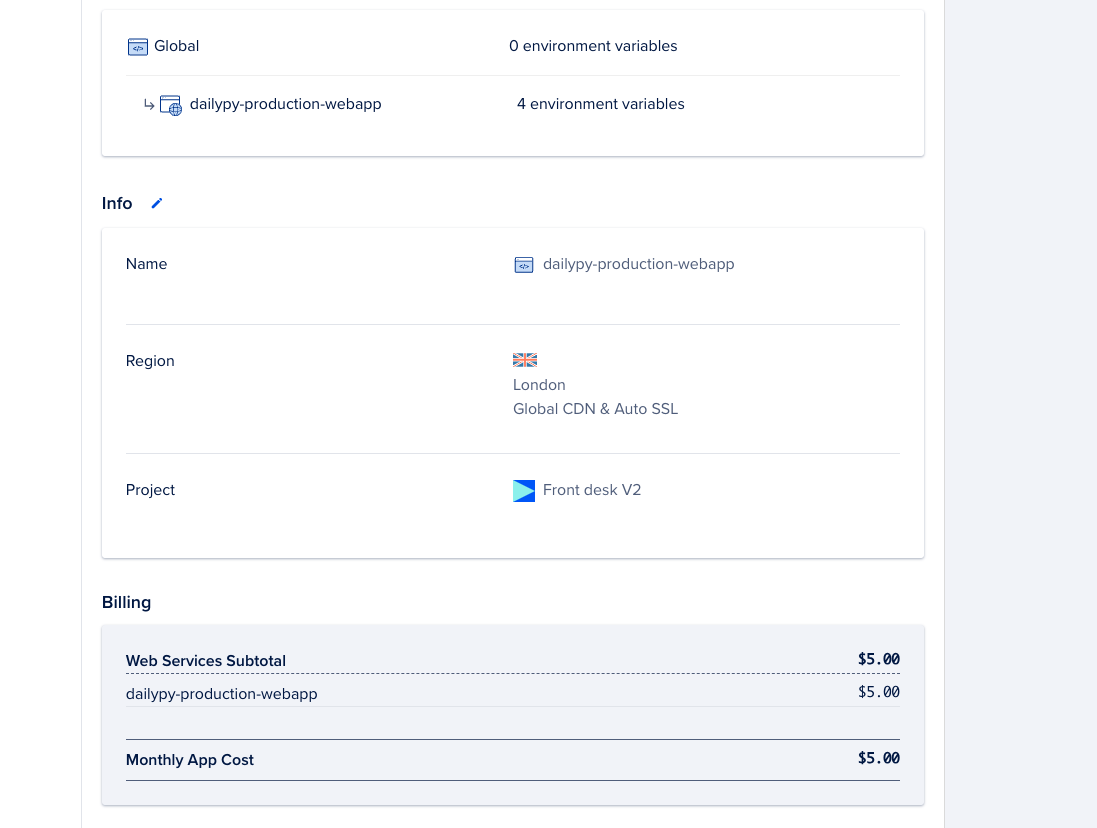
Info
In the info tab, you can set the name of the App and the region where the app will be deployed, I recommend selecting the region that is closest to your users.
Review and Launch
Finally, review the configuration and click on the “Launch” button, your app will be built and deployed, you can see the build logs in the “Build & Deploy” tab.
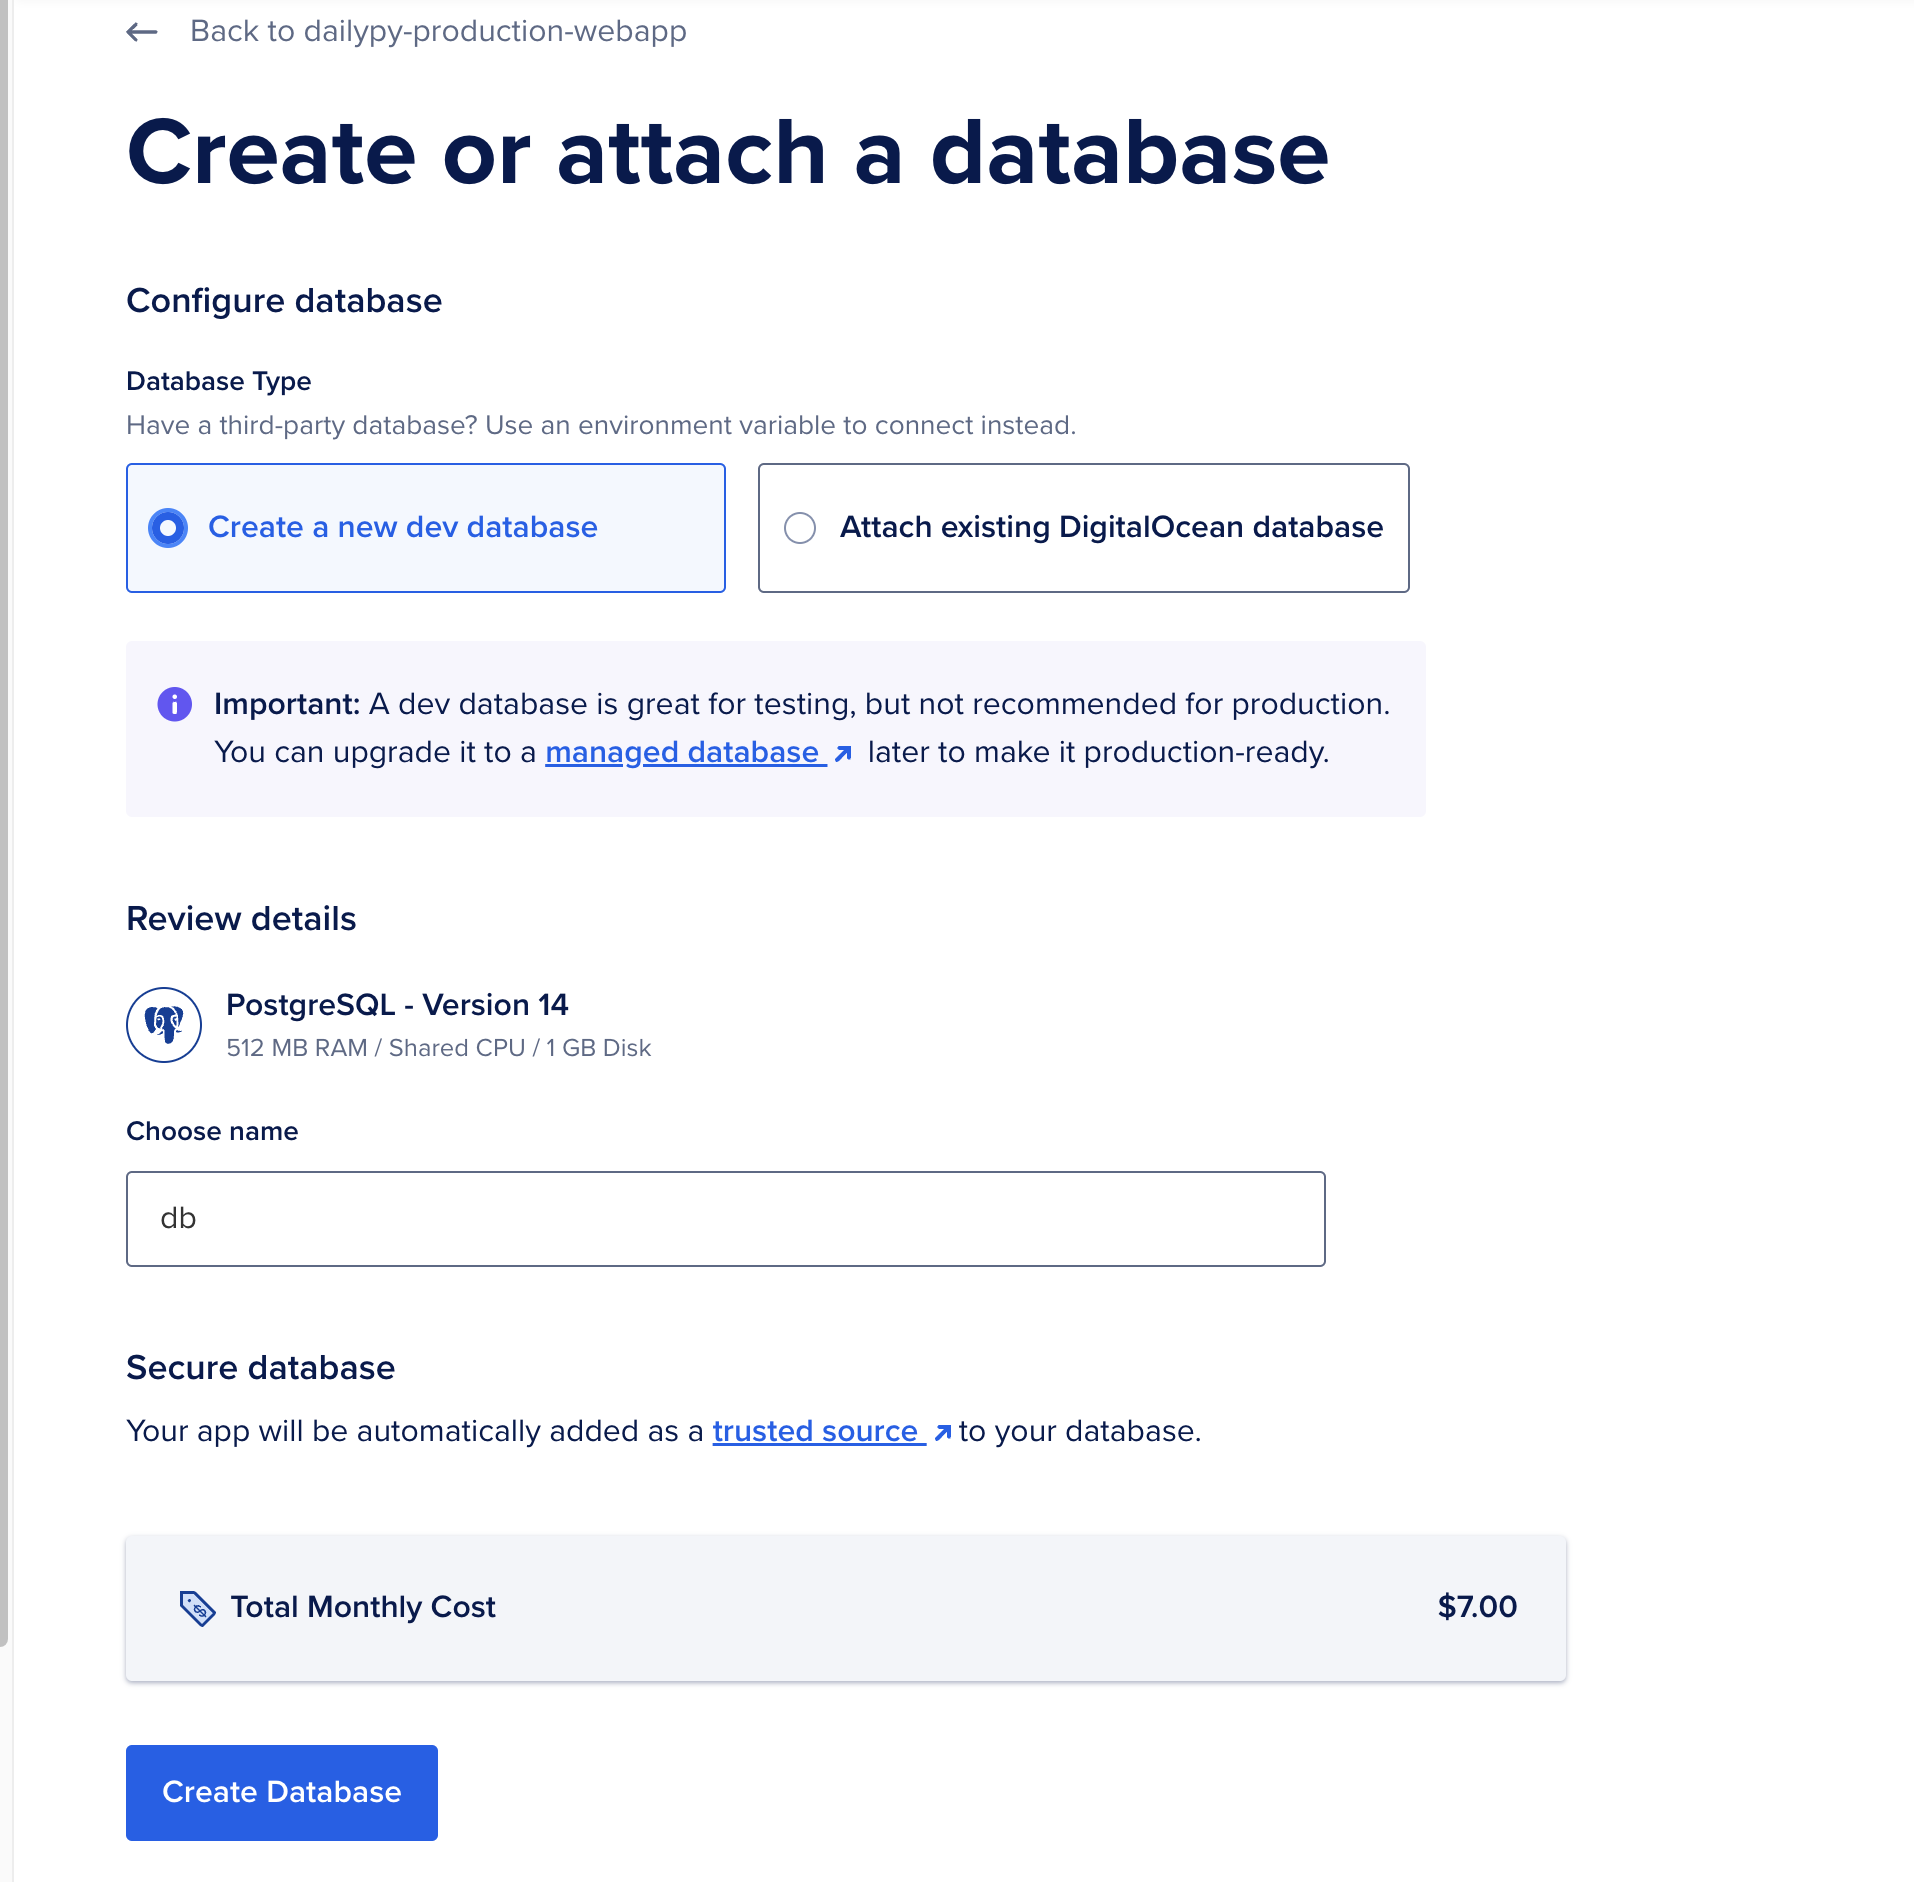
Creating a managed database
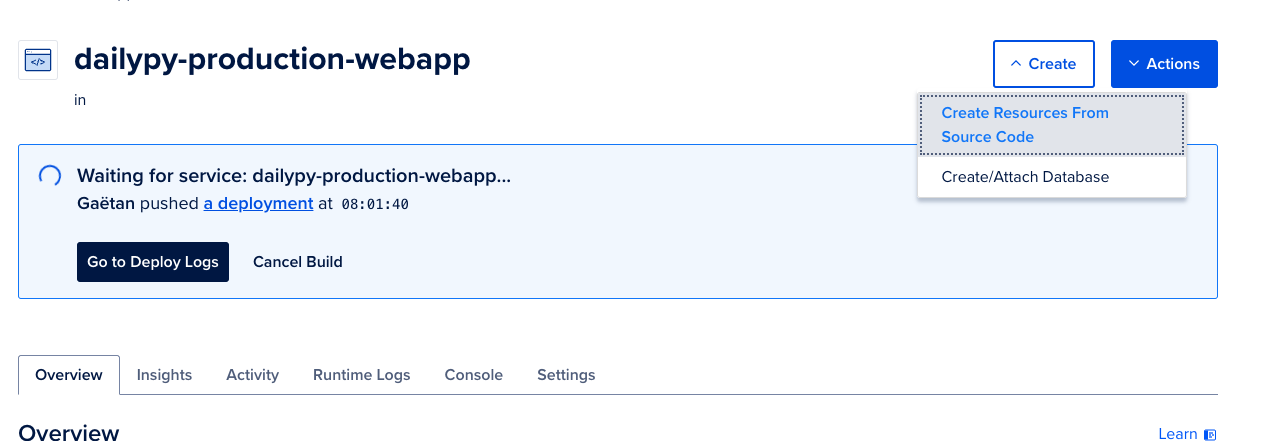
Before we set up the custom domain, we need to set up a managed database, go to your app and click on the “Create/Attach database” button.
Configuration
Choose the Create a new dev database option, you can also use a production database if you want but it is twice as expensive and for a hobby project, the dev database is more than enough.
Keep the default configuration, and click on the “Create Database” button, the database will be created and the connection string will be automatically set up in the environment variables of the app.
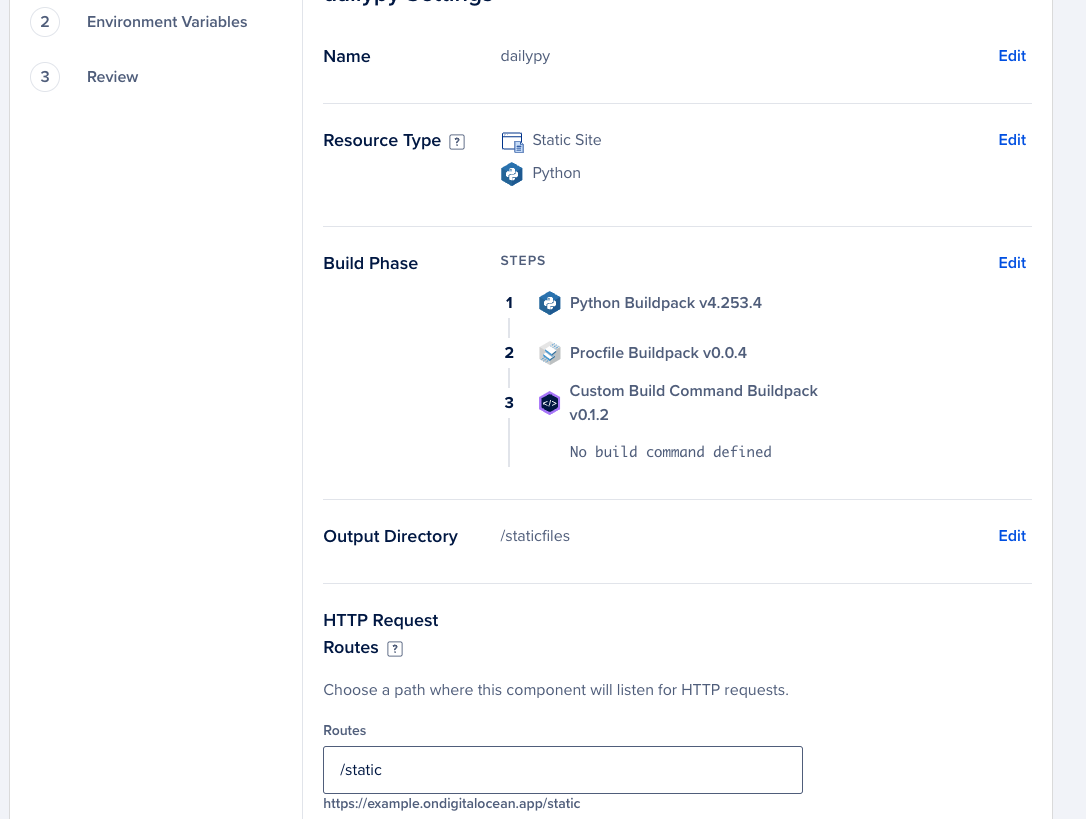
Setting up the static files
Since Digital Ocean App Plateform is a containerized environment, you need to set up the static files to be served by the app, fortunately, Digital Ocean App Plateform has a built-in CDN that serves the static files for free if you use their app platform.
Source code
This is the same as the web service, you need to select the source code repository and the branch.
Name
Again choose a meaningful name, I use the name of the project, the environment and the service name : dailypy_static_production.
Resource Type
Click on edit and select “Static Site”.
Output Directory
This should be set to the directory where the static files are located, in a Django project, if you are using Cookiecutter Django, it should be staticfiles.
HTTP Request Routes
This should be changed to /static since the static files are served from the /static/ directory.
Review and Launch
Finally, review the configuration and click on the “Launch” button, your static files will be built and deployed, you can see the build logs in the “Build & Deploy” tab.
Setting up the custom domain
Deploying a Django app on Digital Ocean App Plateform is great, since it automatically sets up a domain for you, which again is so much easier when prototyping or deploying a hobby project.
However, if you want to use a custom domain, Digital Ocean App Plateform makes it easy to set up, go to the “Settings” tab of your app and click on the “Add Domain” button.
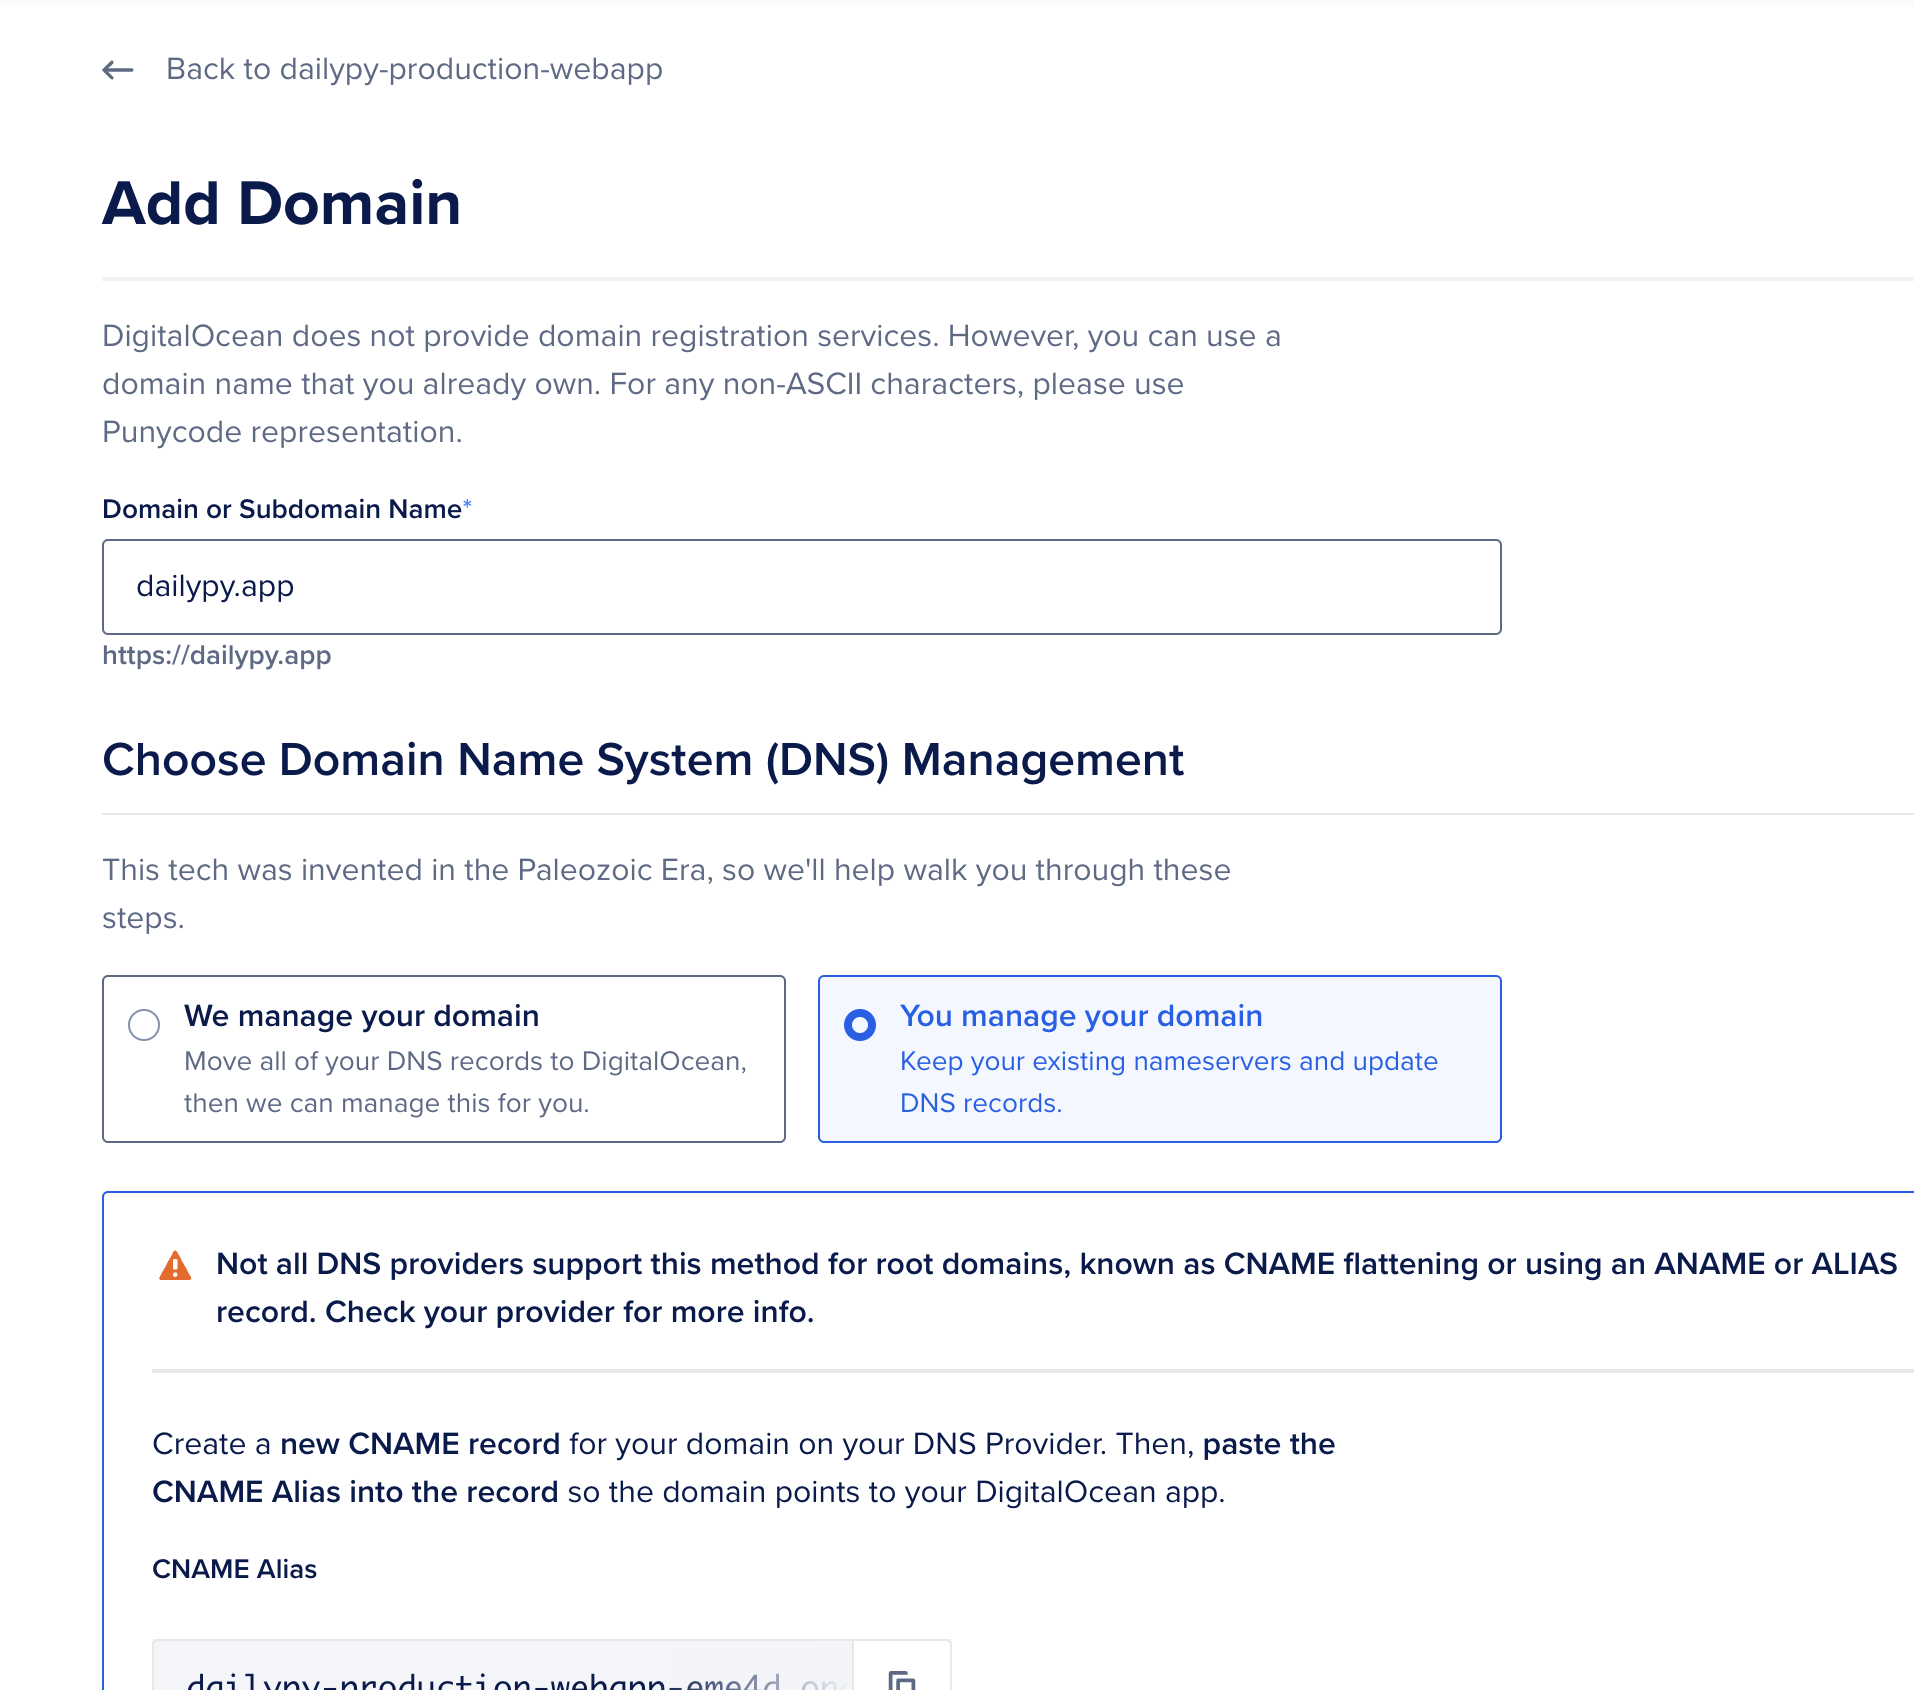
Setting up the domain with your DNS provider
For most providers, you need to set up a CNAME as follows:
- Type: CNAME
- Name: @ or www (depending on if you want to use the root domain or the www subdomain)
- Target/Value: the domain of your app provided by Digital Ocean App Plateform
- TTL: 1 hour/Auto
Wrapping up
I hope this post was helpful for you and that you can understand why App plateform is a very good choice for deploying Django apps.
In under 10 minutes, you can deploy a Django app on Digital Ocean App Plateform with a custom domain and a managed database, you can scale your app horizontally or vertically with a few clicks and you can set up a CDN for the static files and all of that without having to worry about the infrastructure.