I am a long time user of DigitalOcean and I have been using many of their services for more than 6 years, including their Cloud Firewall. I have been using it for a long time and I have been very happy with it.
Most of the time when people create a new droplet they just leave their server open to the world, which is not a good idea, especially if you are running a production server.
If you follow DigitalOcean’s tutorials you will see that they always recommend to create a new firewall and add it to your droplet, but they usually use UFW (Uncomplicated Firewall) which is a very simple but does not take full advantage of DigitalOcean’s own firewall service.
In this tutorial I will show you how to create a new firewall and add it to your droplet using DigitalOcean’s own firewall service and how to configure it to allow only the ports you need.
What is a firewall?
A firewall is a network security system that monitors and controls incoming and outgoing network traffic based on predetermined security rules. A firewall typically establishes a barrier between a trusted internal network and untrusted external network.
In a nutshell, a firewall can be used to block someone to connect to your server via SSH or block someone to access your website.
DigitalOcean’s Cloud Firewall
DigitalOcean’s Cloud Firewall is a free service that allows you to create a firewall and add it to your droplet.
Compared to UFW, DigitalOcean’s Cloud Firewall is more powerful and allows you to create rules based on tags, but it is much simpler to use and has a very simple interface instead of a command line interface.
Creating a new firewall

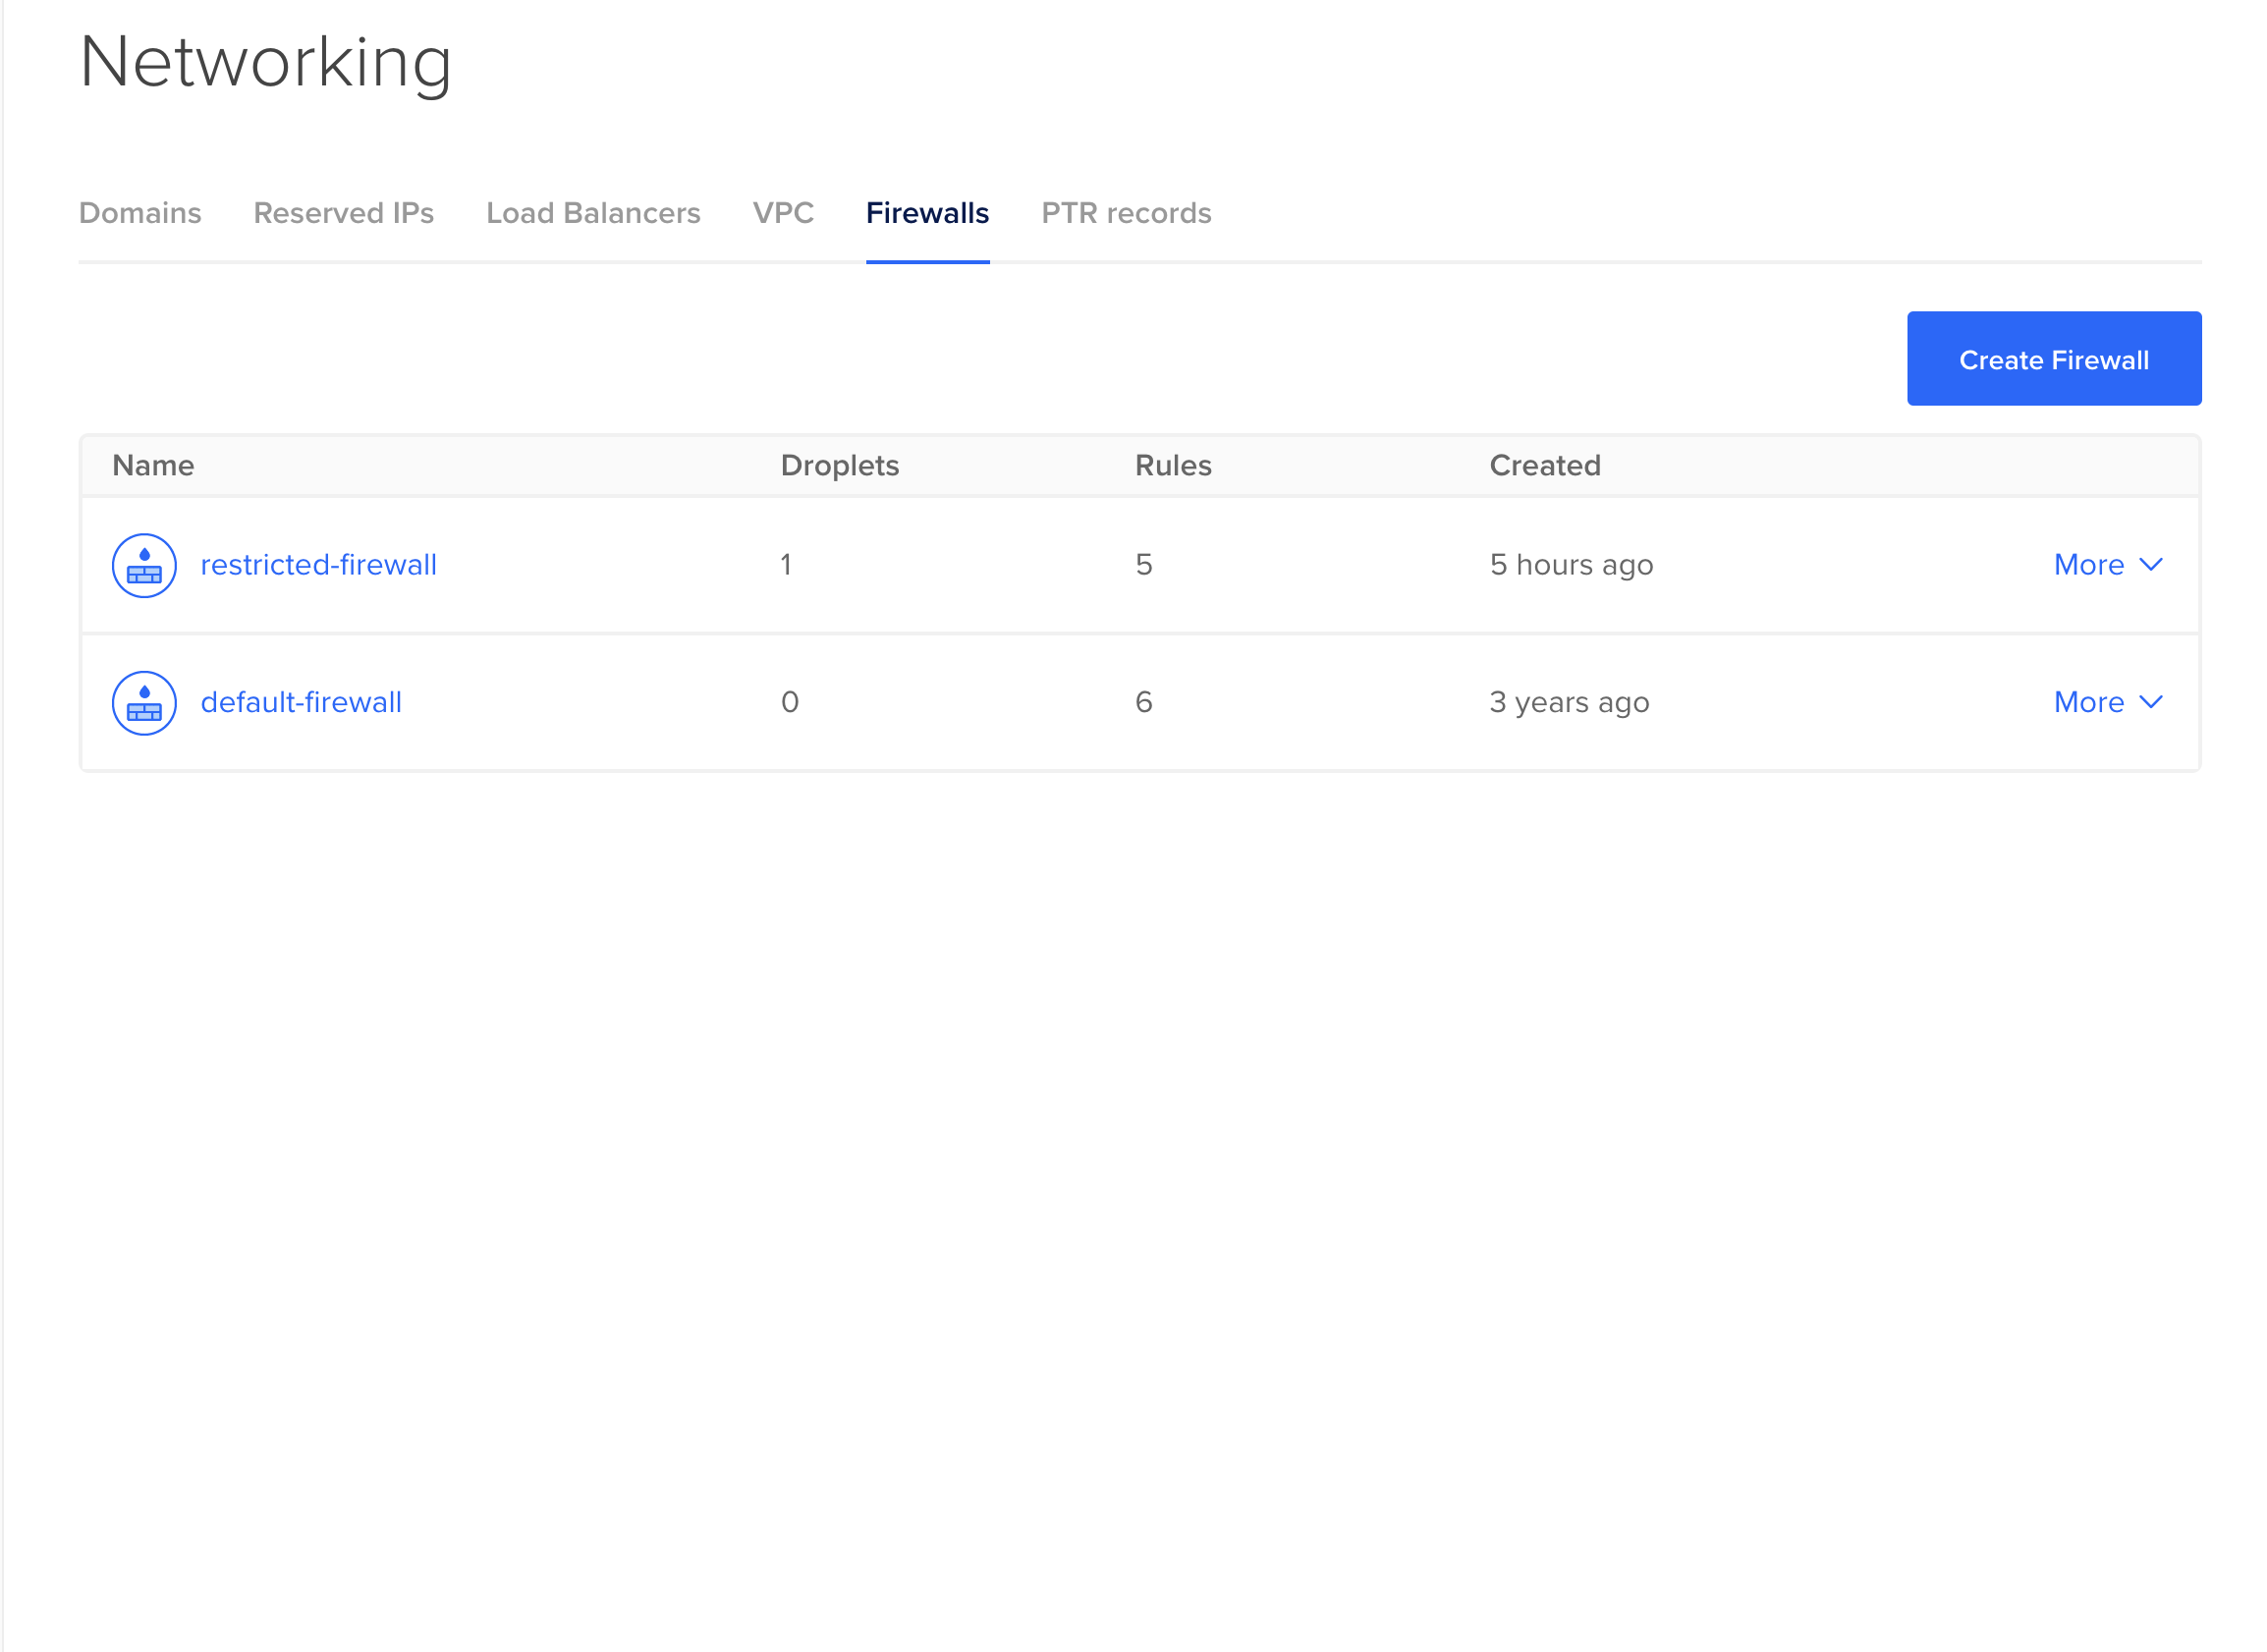
To create a new firewall, go to the Firewalls page and click on the “Create Firewall” button.
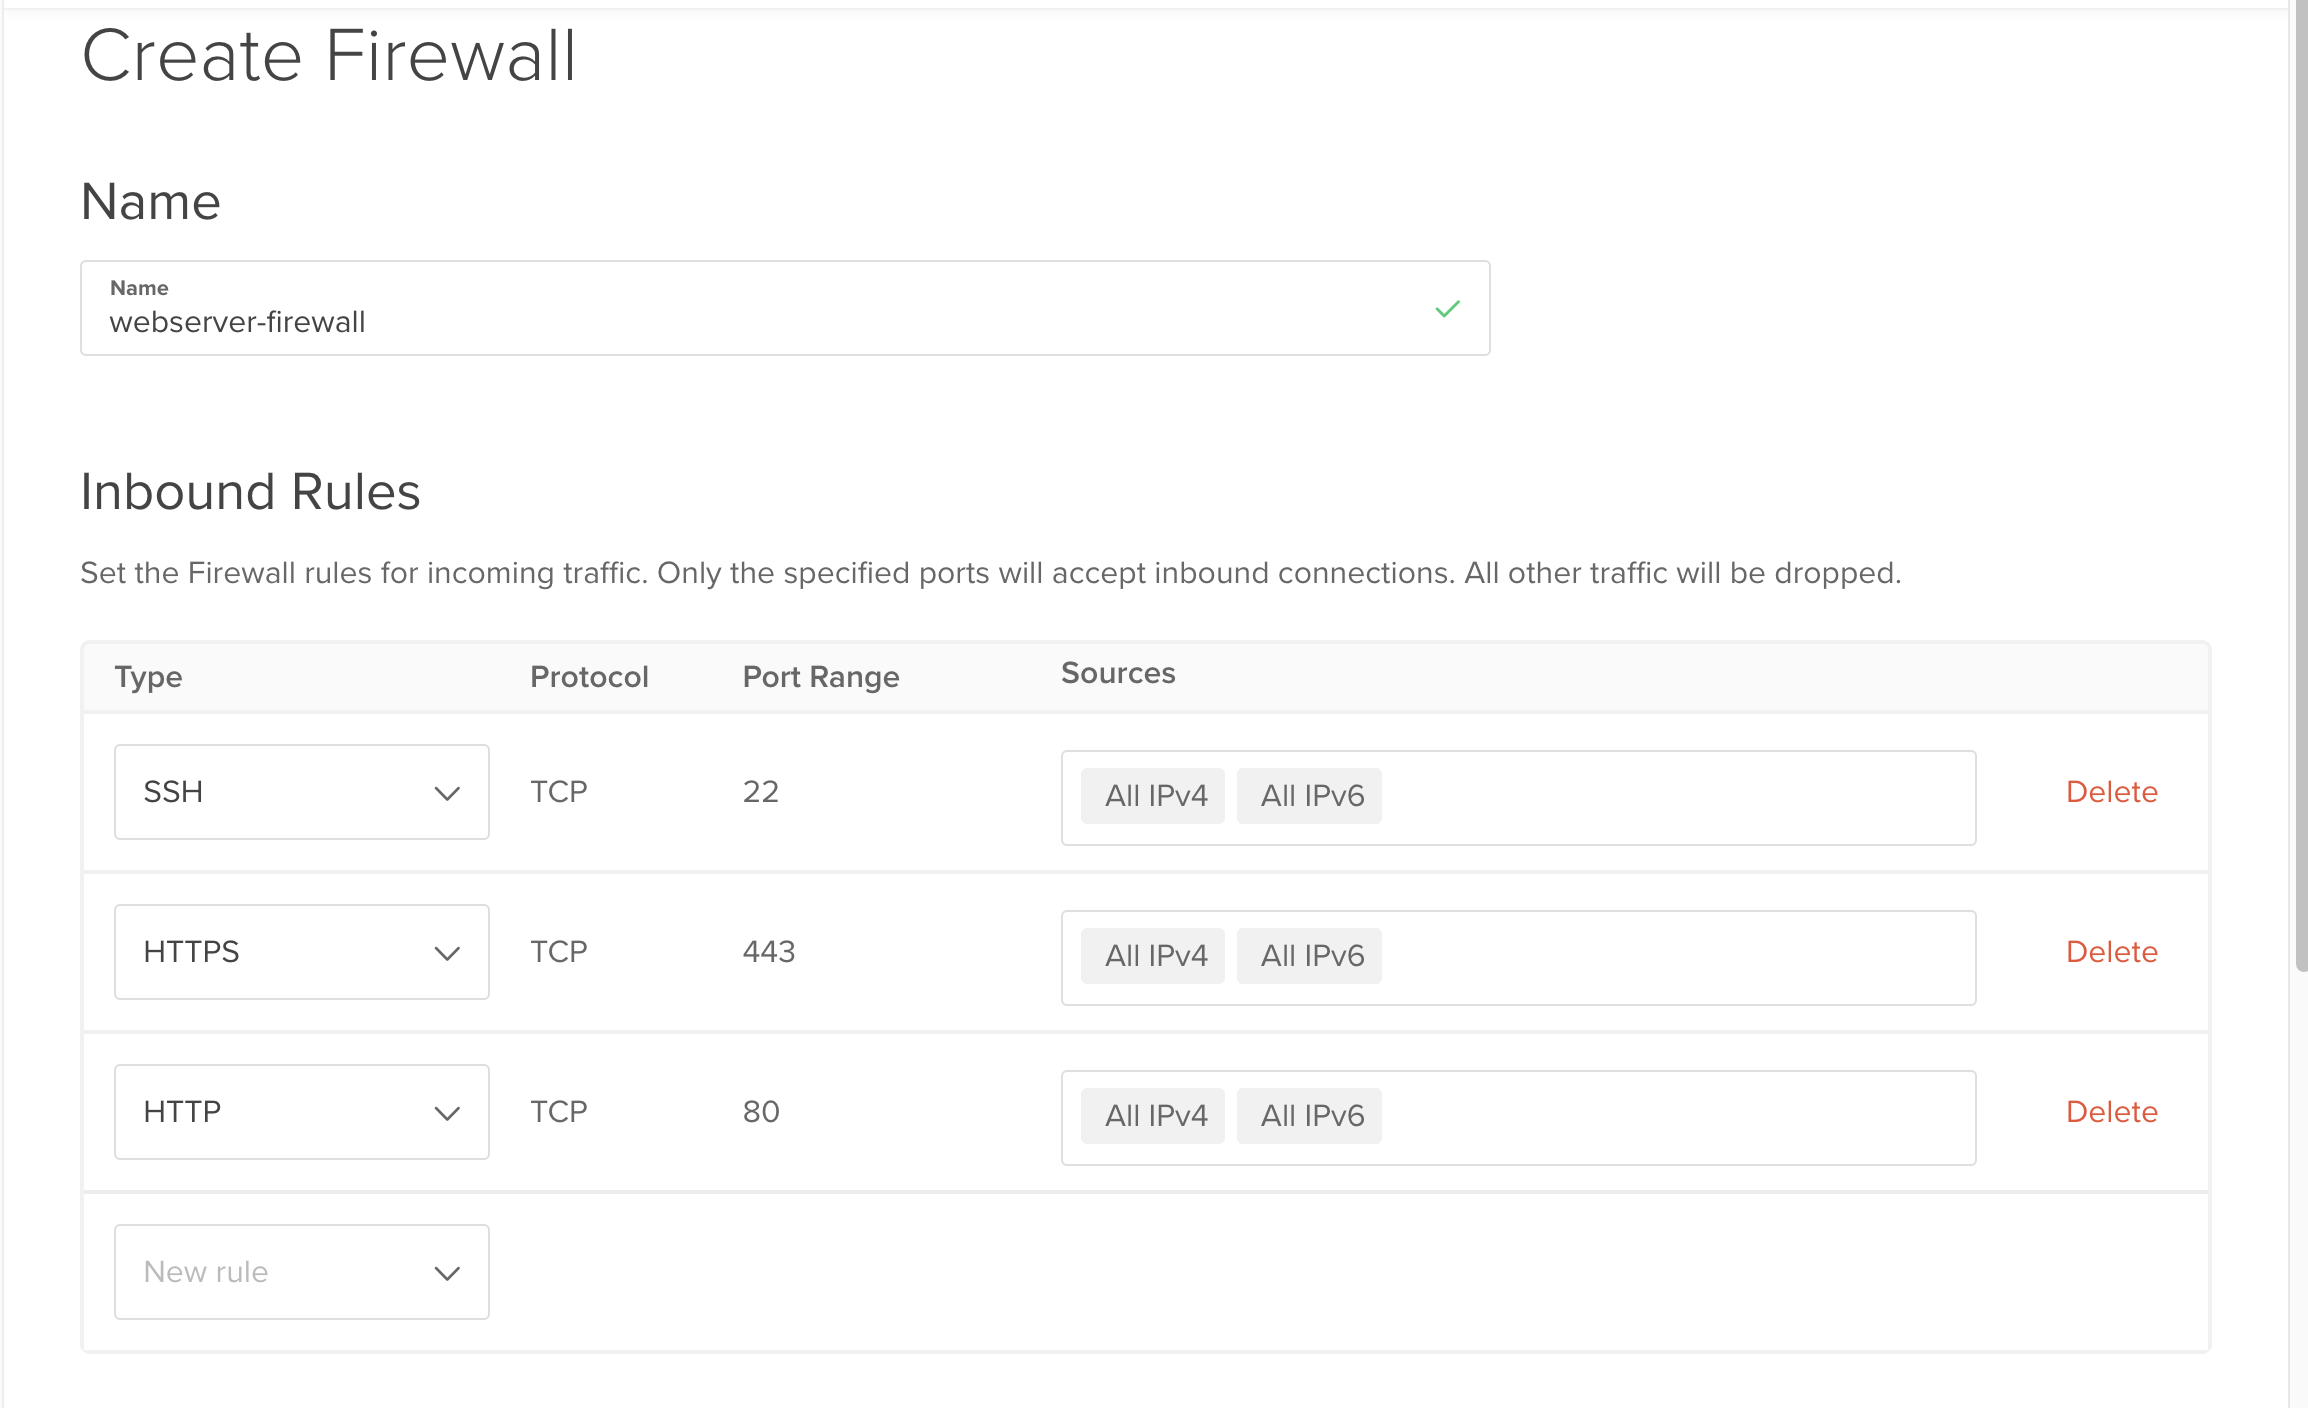
Let’s take a look at the screenshot above:
Category: You can choose between “Inbound” and “Outbound”. Inbound means that the firewall will block incoming traffic and outbound means that the firewall will block outgoing traffic. In this tutorial we will only use “Inbound”.
Type: You can choose a predefined rule set or create your own, for the sake of simplicity we will use the most common one, ssh, http and https.
Protocol: You can choose between TCP, UDP and ICMP. TCP stands for Transmission Control Protocol, UDP stands for User Datagram Protocol and ICMP stands for Internet Control Message Protocol. In this tutorial we will only use TCP since most internet traffic uses TCP.
Port Range: You can choose between a single port or a range of ports.
Sources: You can choose between “Any IPv4” and “Any IPv6” or you can specify a specific IP address or a range of IP addresses. In this tutorial we will use “Any IPv4” and “Any IPv6”.
Droplets: You can choose between a specific droplet or a tag. In this tutorial we will use a single droplet.
Let’s create a new firewall
For a very simple firewall we will use the following settings:
Category: Inbound
Type: ssh, http, https
Protocol: TCP
Port Range: 22, 80, 443
Sources: Any IPv4, Any IPv6
Droplets: droplet-1
Select your droplet and click on the “Create Firewall” button.
That’s it, you have created a new firewall and added it to your droplet, you do not need to do anything else, the firewall will be applied automatically without any downtime or need to reboot your droplet.
Testing the firewall
To test the firewall we will use nmap to scan for open and closed ports.
First we need to install nmap:
$ sudo apt install nmap
Now let’s scan our droplet to see if port 22, 80 and 443 are open:
$ nmap -p 22,80,443 <your-droplet-ip>
This command will scan your droplet and show you the open ports, if you have configured your firewall correctly you should see something like this:
Starting Nmap 7.94 ( https://nmap.org ) at 2023-07-31 23:59 CEST
Nmap scan report for ------ (---.---.---.---)
Host is up (0.083s latency).

PORT    STATE    SERVICE
22/tcp  open     ssh
80/tcp  open     http
443/tcp open     https
As you can see, all the ports are open, which means that our firewall is working correctly.
Now let’s try to scan our droplet again but this time we will use a different port, for example port 21, which is used for FTP and are often used by hackers to gain access to your server.
$ nmap -p 21 <your-droplet-ip>
If you have configured your firewall correctly you should see something like this:
Starting Nmap 7.94 ( https://nmap.org ) at 2023-07-31 23:59 CEST
Nmap scan report for ------ (---.---.---.---)
Host is up (0.083s latency).

PORT   STATE    SERVICE
21/tcp filtered ftp
As you can see, port 21 is filtered, which means that our firewall is working correctly and is blocking port 21.
Conclusion
In this tutorial we have learned how to create a new firewall and add it to our droplet using DigitalOcean’s own firewall service and how to configure it to allow only the ports we need.
to go further, you can read the official documentation or read the official tutorial on how to set up a firewall with DigitalOcean’s Cloud Firewall.

