My go to setup for a new server is using DigitalOcean, with their generous $200 credit for new users you can run a server for free. This guide will show you how to create a new server, secure it and some best practices and tips when using DigitalOcean.
Trust me, it’s easier than you think and it’s a lot of fun.
Why shoud I create my own server?
If you are a bit geeky or want to learn more about how the internet work, creating your own server is a great way to have fun while doing so.
The best part is that you can do whatever you want with your server, for example :
- Hosting your own cloud storage
- Hosting a service like Plex to watch your movies and series from anywhere, legally of course ;)
- Setting up a VPN to access your home network from anywhere
and much more, the possibilities are endless and you can safely experiment with your server without breaking anything.
Who is this guide for?
I assume that you know very little about servers and Linux, if you are a beginner you are in the right place, if you are more advanced you can still learn a thing or two and I hope you will enjoy it.
We will take a deep dive on how to create a server and understanding the differents metrics and options of DigitalOcean.
Create an account on DigitalOcean
Go to DigitalOcean and create a new account, you will get $200 credit for free.
After you have created your account you can create a new server, click on the “Create” button and select “Droplets”.
What is a Droplet?
A droplet is a server, or more specifically a Linux-based virtual machines (VMs).
It run on top of virtualized hardware, this allow to provide abstracted hardware to multiple guest operating systems, this allow to run multiple servers on the same physical machine and break the cost of your bill.
Create a new Droplet
Click on the “Create” button and select “Droplets”, you will be presented with a list of options.
Choose a region
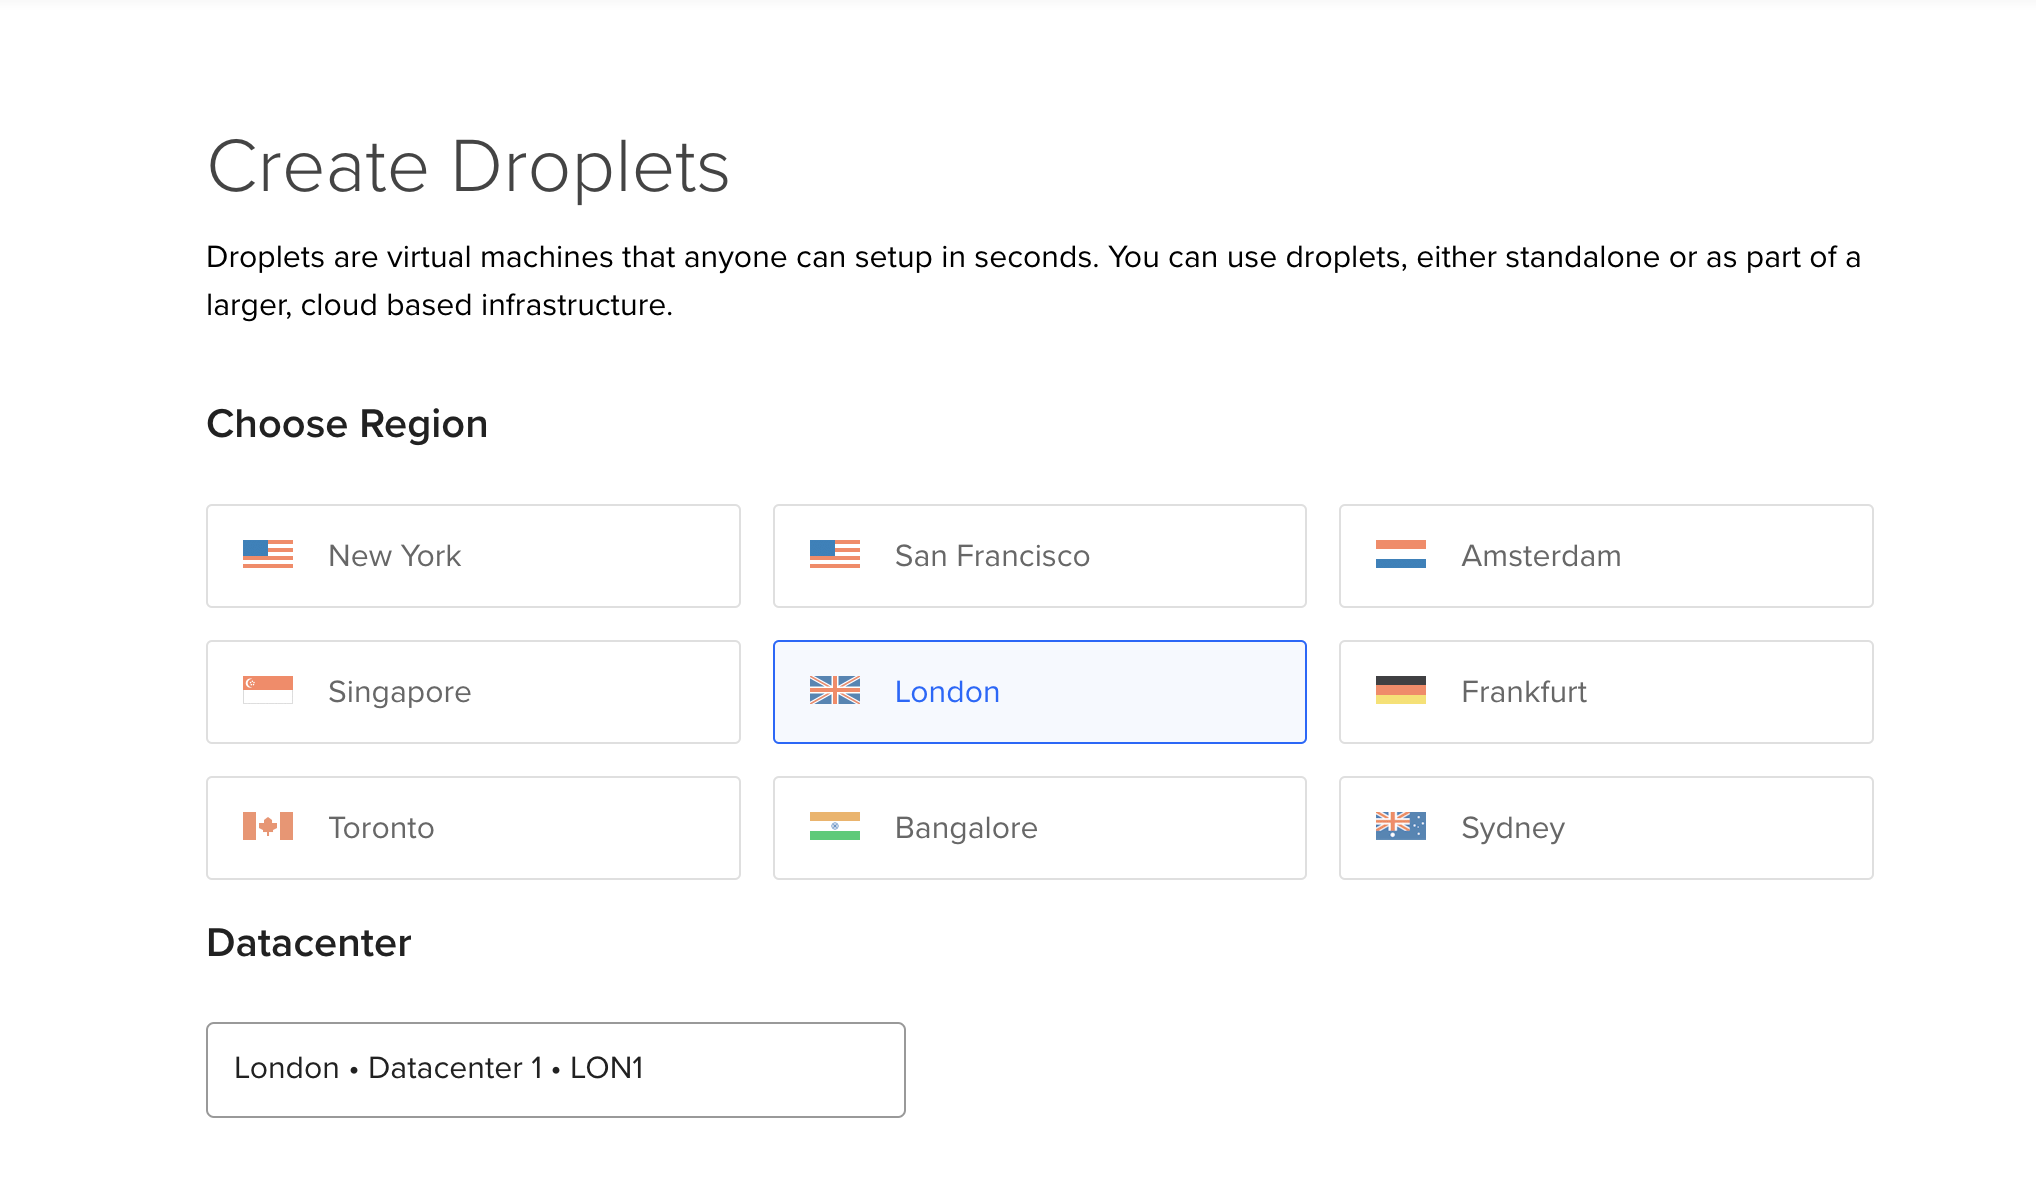
The region is where your server will be located, and it matter for multiple reasons :
The closer the region is to you, the faster your server will be, at the end of the day it’s just a computer located somewhere in the world and still need to send data to you.
GPDPR, if you are located in Europe you will want to choose a region in Europe to be compliant with the law, if it’s for personal use you can choose whatever you want.
Choose a image/Distribution
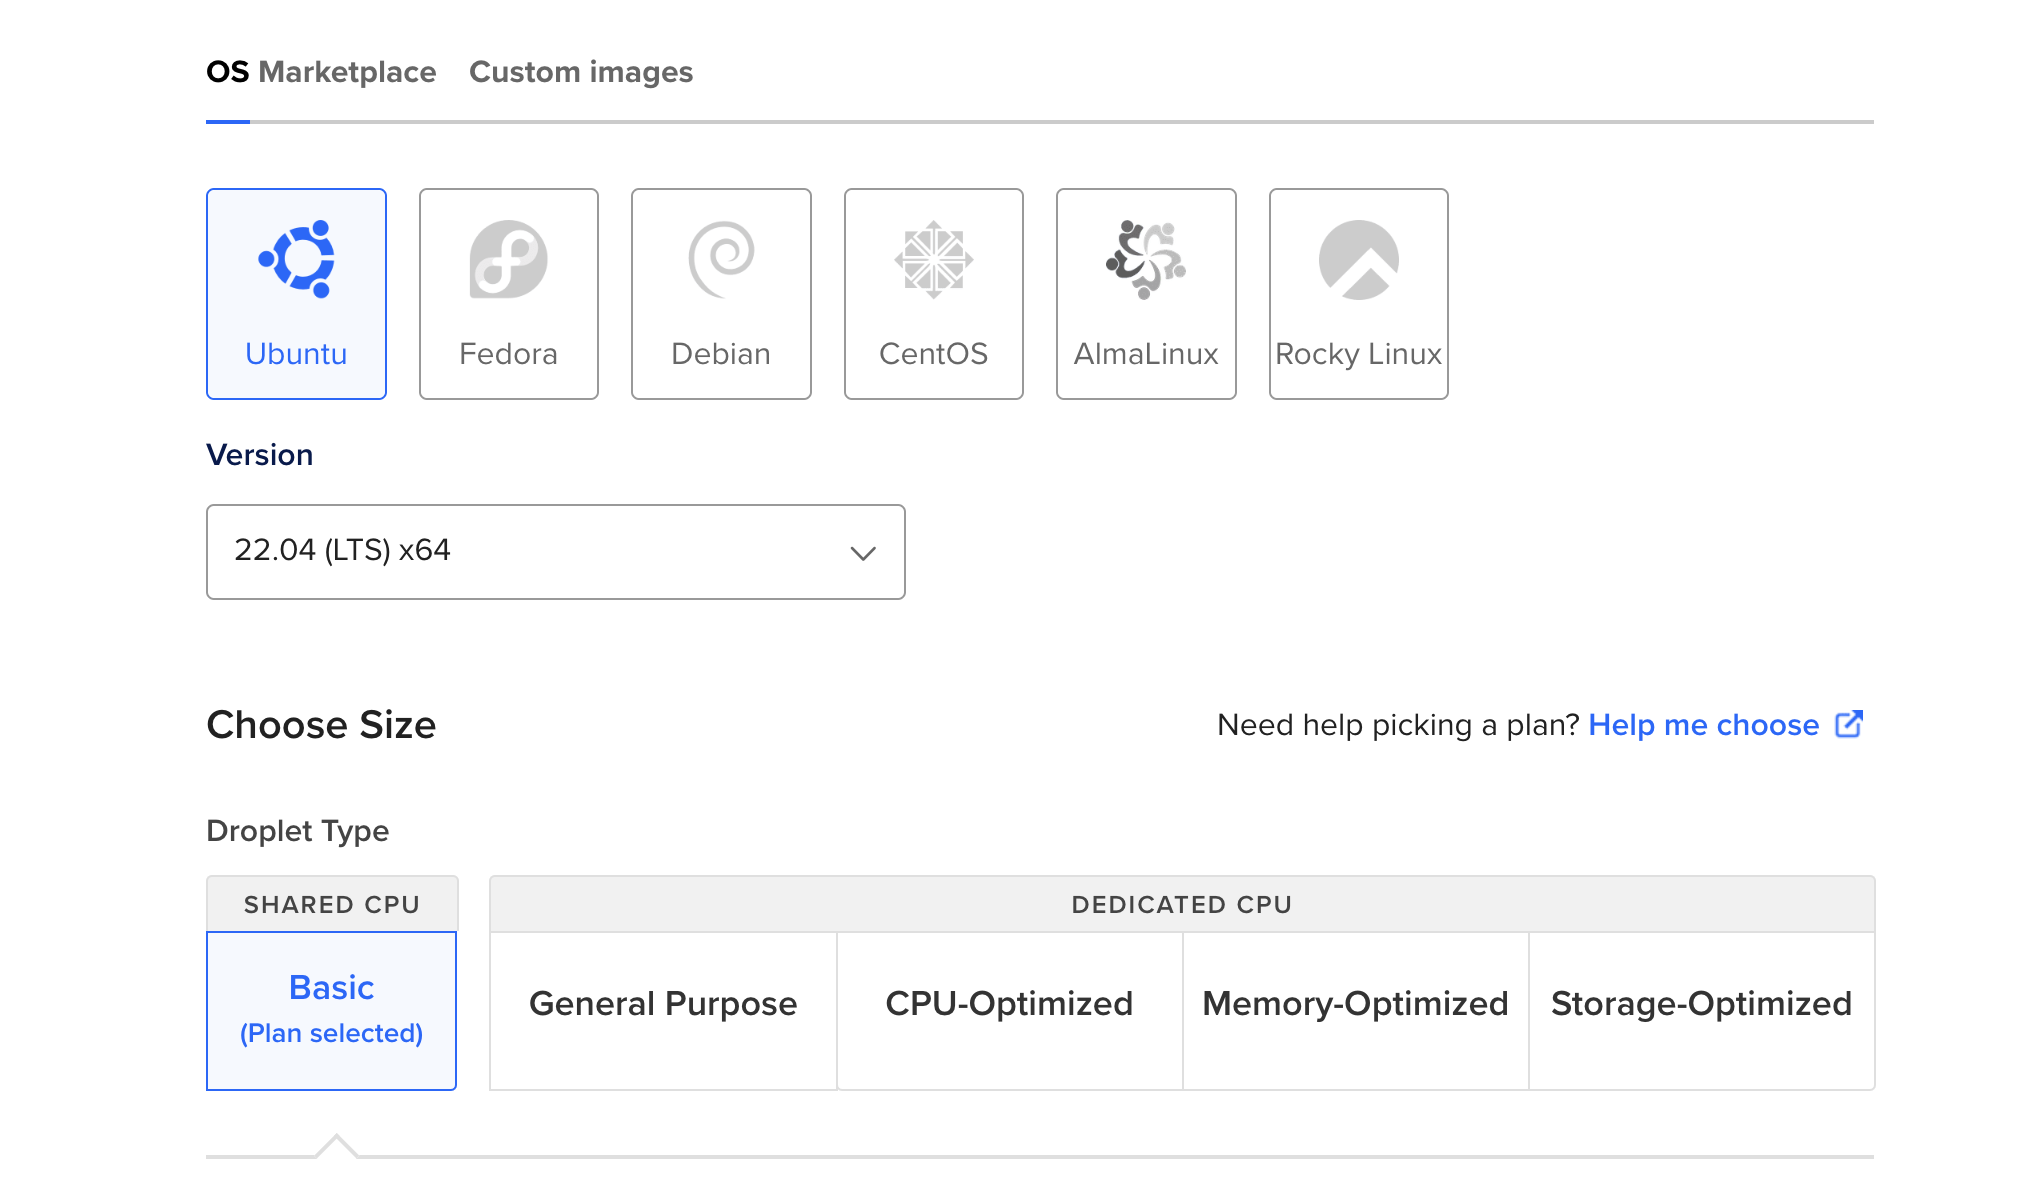
The image is the operating system that will be installed on your server, Ubuntu is a great choice for beginners and is the most popular Linux distribution.
Choose the latest LTS (Long Term Support) version, at the time of writing it’s Ubuntu 22.04 which was released in april 2022 and it will be supported until may 2027, meaning you will get security updates until then.
Choose a plan
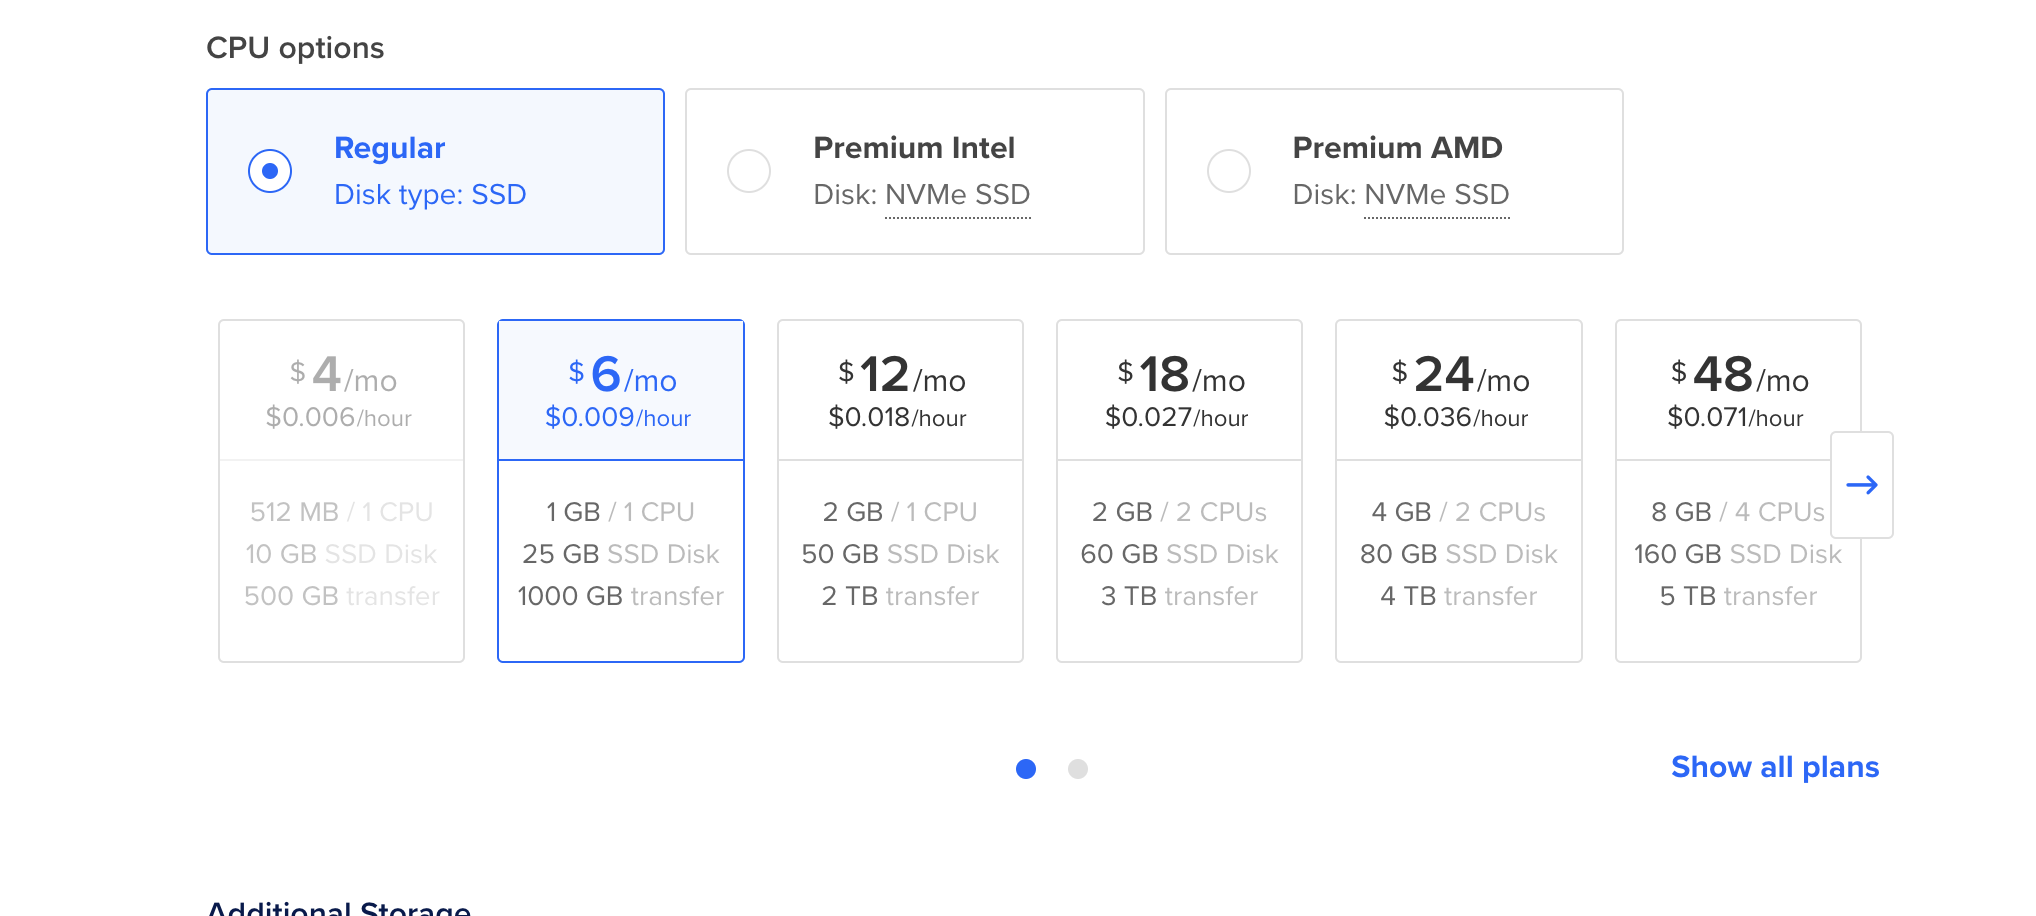
By default Digital Ocean will select a very expensive plan, but the cheapest one at $6/month is more than enough and will be free for 2 months with the $200 credit.
In the CPU section choose Regular and the plan with 1GB of RAM, 25GB of storage and 1TB of transfer.
Choose an authentication method
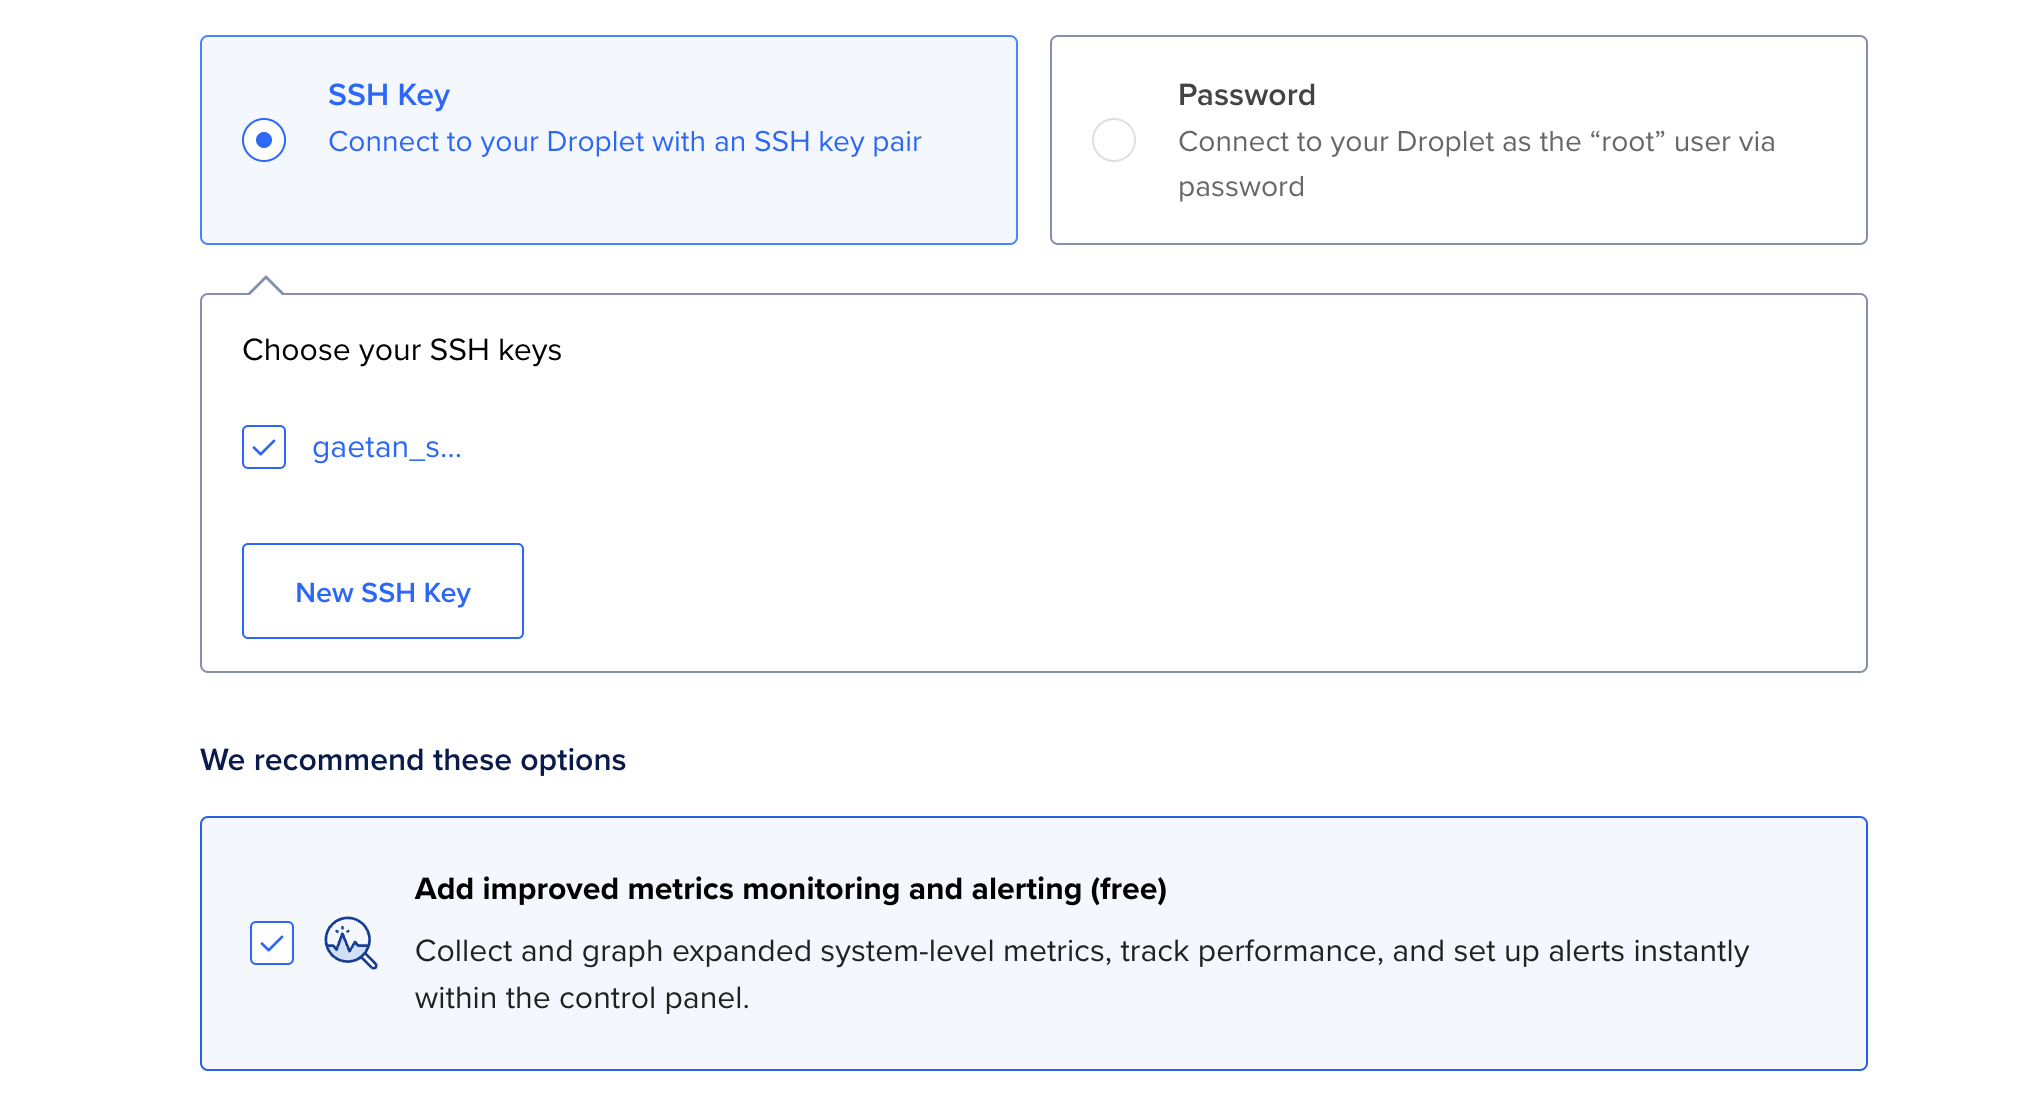
You can choose between a password or a SSH key, the password is the easiest way to connect to your server but it’s not the most secure and I don’t recommend it.
The SSH key is a pair of keys, a public key and a private key, the public key is stored on your server and the private key is stored on your computer.
When you connect to your server, your computer will send the public key to your server and if it match the private key stored on your server you will be granted access.
Generate a SSH key
If you don’t have a SSH key you can generate one with the following command :
ssh-keygen
You will be asked where to save the key, you can leave the default location and press enter.
You will be asked to enter a passphrase, A passphrase is a sequence of words for example “correct horse battery staple”, create or leave it blank and press enter.
At the end you will have 2 files, a private key and a public key, the private key is the one you need to keep safe and the public key is the one you will put on your server, you should see two file called id_rsa and id_rsa.pub and a keyrandomart that you can ignore.
Add your SSH key to your server
Copy the content of the public key with the following command :
cat ~/.ssh/id_rsa.pub
You will see something like this :
ssh-rsa AAAAB3NzaC1yc2E....
Copy the content of the public key including the ssh-rsa part and go back to DigitalOcean, paste it in the “SSH keys” section and give it a name.
Choose your options
The only option you need to toggle is metrics monitoring, and alerting, it’s free and will give you some useful information and graphs about your server, you can set it up later from the command line if you want.
Choose a hostname
The hostname is the name of your server, you will see it when you connect to your server with SSH, so choose something that make sense to you.
Tag your server
Tag can be useful if you want to apply some actions to multiple servers at once, the best example being the cloud firewall of DigitalOcean, I have written a guide about it here.
Create your server
Click on the “Create Droplet” button and wait a few seconds, your server will be created and you will see the IP address of your server.
Well done, you have created your first server, and secured it with a SSH key, before we go further let’s see our newly created server.
Your droplet dashboard
Click on the “Droplets” link in the left menu, you will see your server and some information about it.
Understanding the dashboard
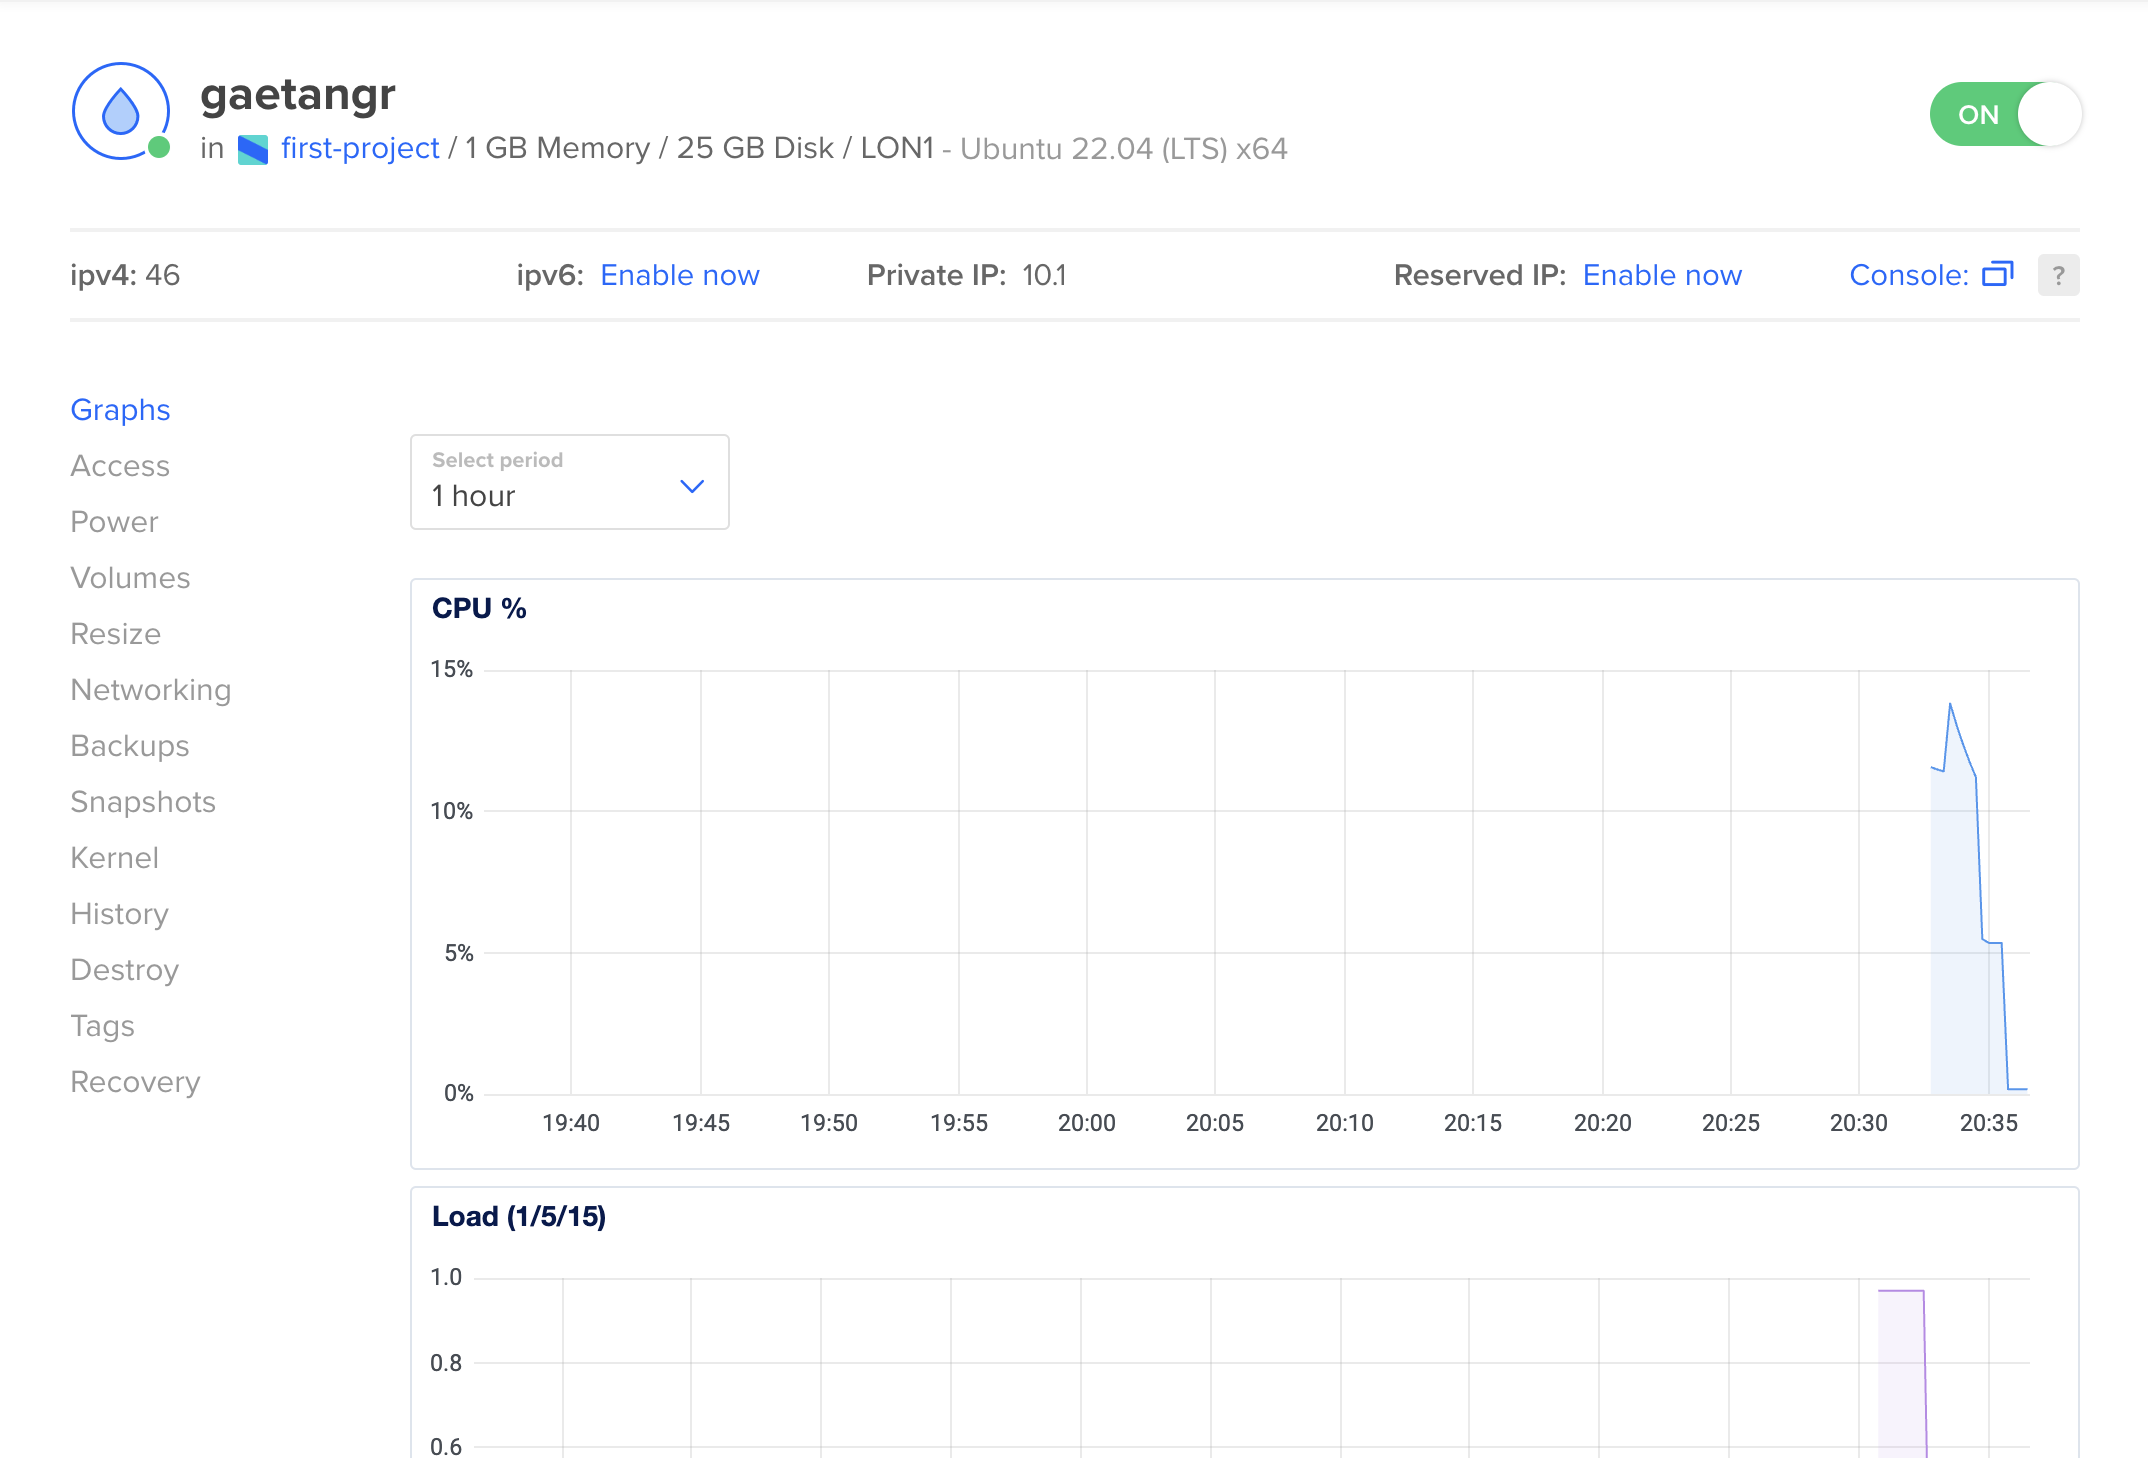
Graphs Panel
CPU : CPU utilization measures the amount of processor being used at a given time. CPU utilization is expressed as a percentage.
Load : Load average is a metric that shows the number of tasks currently executed by the CPU and tasks waiting in the queue, unlike CPU utilization, the load is over a period of time.
Disk : Disk usage is a measurement of how much disk space is currently being used, if you have a 25GB disk and you use 10GB you will see 40% in the graph, if you hit 100% your server will crash… so don’t do that.
Disk I/O : Disk I/O is a measurement of how much data is being read from or written to the disk, it’s measured in MB/s.
Bandwidth : Bandwidth is a measurement of the amount of incoming or outgoing traffic passing through the Droplet’s network .
Access Panel
You can access your server with the “Console Access” button, it’s a web based terminal that allow you to access your server if you don’t have a SSH client installed, DigitalOcean will use your SSH key to authenticate you.
Power Panel
You can power off, reboot or power on your server with the “Power” button.
To ensure a clean shutdown of your server, you should always power off your from the command line with the following command :
sudo poweroff
Volume Panel
You can add a volume to your server, a volume is a block storage device that can be attached to a Droplet, it’s like a SSD that you can attach to your server
Resize Panel
You can resize your server, you can add more CPU, RAM, storage and bandwidth, you can also downgrade your server if you want.
Networking Panel
Useful if you want to add a floating IP to your server, or setup a firewall, more on that later.
Backups Panel
You can enable automatic backups, it will create a backup of your server every week, it cost 1.20$/month for a 25GB server and are stored for 4 weeks.
Snapshots Panel
Snapshots are a point-in-time image of a Droplet it’s created manually and stored until you delete it, it cost 0.05$/GB/month.
What’s the difference between a snapshot and a backup?
Backups in DigitalOcean are automatic and retained for four weeks. Whereas snapshots are created manually, it gets removed only when we choose to do it. A backup is incremental, but a snapshot is a disk image at the point of time we take it
Kernel Panel
After march 2017, DigitalOcean started to manage the kernel of your server, you do not need to care about it.
History Panel
You can see the history of your server, when it was created, when it was resized, when it was rebooted, etc.
Destroy Panel
You can destroy your server, it will be deleted and you will lose all your data, so be careful.
You can also choose to rebuild your server at it’s original state, it will be like a fresh install of Ubuntu with no data but your SSH key and configuration will be kept.
Let’s wrap it up
You have created your first server, secured it with a SSH key and learned about the dashboard of DigitalOcean and what the different metrics mean, in the next part coming next week we will see how to connect to your server with SSH, how to update your server and lot of other useful things.
Useful links
DigitalOcean : My referral link, you will get $200 credit for free.
I hope this article was helpful, if you have any question or suggestion, feel free to reach out to me on :
- By email at [email protected].
- If you want to know more about me, you can check out my about page.
You can use my articles with no cost or attribution, feel free to edit them and make them your own.